Watercolor and Silver Leaf Polymer Clay Pendant
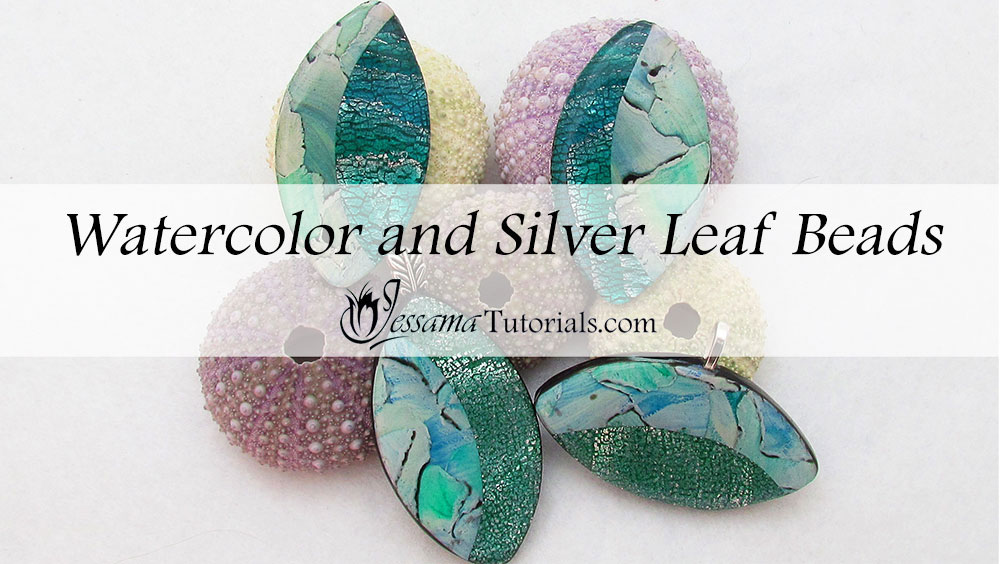
In this tutorial I'll be pairing the painted watercolor technique with translucent silver leaf Mokume Gane to make some stunning polymer clay pendants.
I first showed these pendants at the end of my Translucent Silver Leaf Mokume Gane Tutorial, and many different people requested that I do a project tutorial on them. So here it is...
Before watching this video, please watch my Watercolor Tutorial and my Translucent Silver Leaf Mokume Gane Tutorial. They are
essential parts of this polymer clay project. You’ll find the links in the box
below the video.
You will need the following supplies:
- A Translucent Silver Leaf Mokume Gane Sheet
- A Watercolor Sheet
- A tissue blade
- An acrylic roller
- A cutter
- A pasta machine
- Black polymer clay (I’m using Premo)
- An oven
- A craft knife
- A stick-on bail
- Sand paper
- Resin (I’m using Ice Resin)
- A measuring cup
- A straw
- A popsicle stick
- A resin mat (Silicone is preferred)
Steps To Making Watercolor and Silver Leaf Mokume Gane Polymer Clay Pendants
- Start with a Watercolor Sheet and a Translucent Silver Leaf Mokume Gane Sheet. Both sheets need to be at the same thickness (the fifth setting on my pasta machine).
- Cut out a bead from each sheet using your chosen polymer clay cutter.
- Take your beads and gently place one on top of the other. Don’t press them together. (If your clay is soft and sticky don’t place them on top of each other. Leach them first or eyeball the next step as the two layers can stick together.)
- Cut the two beads in a curve down the middle using your tissue blade. (Please see the video tutorial for more information on this.) Quickly separate all the pieces and lay them out.
- Take one piece of each type and combine them so that you have a polymer clay bead with two different sheets side by side. Repeat to make a second bead.
- Gently smooth down the seam between the two halves.
- Take a sheet of black polymer clay and cut out a bead from it using the same cutter. Place the stick-on bail where you want it.
- Place one of the beads you just made on the black clay so that the pieces line up and you sandwich a part of the stick-on bail between the two layers. Press the two together. Don’t press too hard. You don’t want to distort the bead. Smooth down the edges of the pendant so that they look smooth.
- Repeat for the other pendant.
- Bake for half an hour at the recommended temperature for your polymer clay brand.
- Once baked and cooled, take some black polymer clay and smear it down the sides of your polymer clay pendant. This will give it a more finished look. Make sure the sides are smooth before placing the beads in the oven for another half an hour bake.
- Once baked and cooled, sand the edges and front for a professional look.
- The final step is to seal your polymer clay. I’m using Ice Resin. (Please watch the video tutorial for more information on how to seal polymer clay with resin.)
Suggested links
where to buy supplies
If I have missed something, or you still have questions, please leave a comment below.
You can like my Facebook page or join the Jessama Tutorials Polymer Clay Community on Facebook to stay up to date with more polymer clay tutorials like this one as they are released.



Please leave your comments below: