


Polymer Clay Silk Screening Red Rose Project
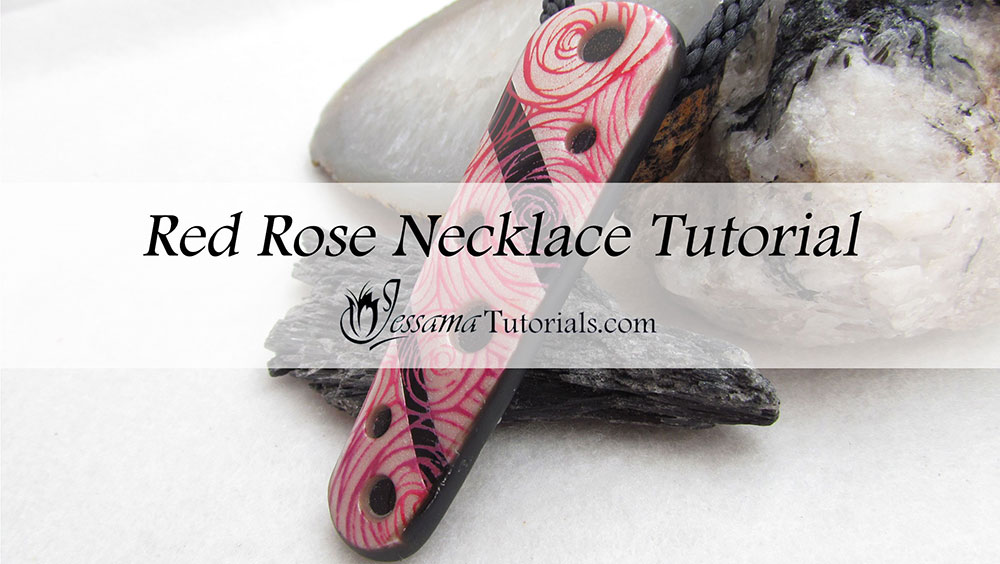
In this project we will be including polymer clay silk screening in our design. Silk screening on polymer clay is an easy technique that opens up a whole new world of design possibilities.
There are some really stunning silk screens available so take a look around and see what catches your eye. In this tutorial, we will be following a romantic theme with pinks and reds and a nouveau roses silk screen pattern.
You will need the following supplies:
- Pearl white and black
polymer clay (I'm using Premo)
- Paint (I’m using Martha Stewart Holly Berry and Fruit Punch and Dazzling Metallic Berry)
- A silkscreen (I'm using Nouveau Roses from Creatalong.com)
- A texture stamp (I'm using Helen Breil's Congo stamp)
- A Sponge for texturing
- A ruler
- A cutter (I'm using my Sponge Finger Dagger set)
- A water spray bottle
- Mini round cutters
- An acrylic roller
- A tissue blade
- A pasta machine
- An oven
- Wet/dry sandpaper or polishing papers
- Renaissance wax
- Ice resin
- Black bugtail cord
- Two silver end caps
- E6000 glue
- Two silver jumprings
- A silver clasp
- Nymo thread
Polymer Clay Silk Screening Red Rose Project
Silk Screening the Front- To start, you need a sheet each of pearl white and black polymer clay, run through on the thickest setting of your pasta machine. I'm using Premo, but any brand will do.
- Use a ruler to trim two narrow strips of different widths from your black clay.
- Use a ruler to make a straight cut through your pearl white.
- Place one of your black strips against the straight edge of the white and replace the second piece of white.
- Repeat for the second black strip.
- You should now have a pearl white sheet with two black strips going through it.
- Lay a sheet of paper or plastic over your sheet and use a bone tool or your roller to burnish it flat and eliminate seams. Don't roll.
- Trim up the edges of your sheet to the size that you want to use for your design before the polymer clay silk screening.
- Lay your silk screen down on top of your sheet of clay. Make sure you have it the right way up and gently burnish it onto the polymer clay so that it sticks. (I'll be using Nouveau Roses from CreateAlong.com. If you are using one of their silk screens you want to make sure that you use it orange side down.)
- I am using Martha Stewart Holly Berry and Fruit Punch paint and Dazzling Metallics Berry paint. I'm going to be creating a skinner blend effect using them.
- Start with the Holly Berry and lay a stripe across one side of your sheet. Apply a stripe of Fruit Punch down the middle and a stripe of Berry at the other end.
- Use your squeegy and scrape from one end of the sheet to the other, starting with the Holly Berry end.
- Scrape again to remove excess paint.
- Remove the silk screen and rinse immediately under running water and leave to dry.
- Trim up the edges of your silk screened sheet and then allow to dry for about 20 minutes.
- For the back of the bead you need a sheet of black polymer clay rolled out on the thickest setting of your pasta machine.
- Place your chosen texture sheet face up on your work surface. (I'm using Congo Line by Helen Breil)
- Spray the stamp with water and lay your sheet of clay over the top. Spray the clay with water too and then press it into the stamp using your fingertips, working from one side of the sheet to the other.
- Texture the top of the black clay using sponge.
- Lift the sheet from the texture stamp and put it aside. Clean away any water from your sheet and your work surface.
- Bring over your dried silk screened sheet and cut your pendant out. (I'm using the largest sponge finger dagger from my set on JessamaDesign.)
- Try to cut so that you include all the paint colors as well as the two black stripes.
- Using small circle cutters, cut some holes out from your pendant.
- Lay the piece on the sponge textured side of your black backing.
- Use your cutter to cut around again.
- Trim up the edges using your tissue blade.
- Cut out a strip of your textured black for a bail. Wrap it around a skewer and mark where the clay meets up.
- Trim the clay and then remove the back of the cylinder using a craft knife. (See the video.)
- Place the bail on the back of the pendant.
- Bake in the oven for an hour at the recommended temperature.
- Finish off the sides of the pendant using the Jessama Smear Technique.
- Bake for half an hour.
- When cool, sand the edges and the backs using wet/dry sandpaper or polishing papers, working your way through the grits.
- Add a light layer of renaissance wax to the backs and sides and give a good buff with a soft cloth.
- Allow the wax to dry for about ten minutes.
- Apply a thin layer of resin to the front surface. For a step by step walk through on using Ice Resin, please see my Ice Resin Tutorial.
- Allow to cure for about 24 hours.
- Create a Kumihimo braid using black bug tail. You can see my tutorial on Patreon if you haven't made Kumihimo before.
- Tie off the ends using Nymo thread.
- Trim off the ends and then bulk them up if necessary until the ends of your braid are the right size to fit snugly into your end caps.
- Glue an end cap onto one the end of the braid using e6000 glue.
- Thread the braid through the bail.
- Glue on the other end cap and allow to dry for 24 hours.
- Attach your clasp using jump rings on either end of the braid.
In the video tutorial I show the polymer clay silk screening process in detail, as well as how to apply the resin and more detail on finishing off the braid, so please do take a look at that.
Suggested links
- Jessama smear Technique
- Kumihimo Tutorial on Etsy or Patreon.
Supplies
- Nouveau Roses Silk Screen
- Congo Line Texture Stamp
- Sponge Finger Dagger Cutters
- Micro Circle Cutters
- Ice Resin Plunger
If you are struggling with the Ice Resin, you can find a full Tips and Techniques tutorial that walks you through the process on my Patreon community page or in my Etsy Shop.
If I have missed something, or you still have questions, please leave a comment below.
You can like my Facebook page or join the Jessama Tutorials Polymer Clay Community on Facebook to stay up to date with more polymer clay tutorials like this one as they are released.
You may also like:


Become a Member

Join my Facebook Group

Find Me on Etsy

What's New?
-
Dry Clay Polymer Clay Crackle
 Today I'll be creating a mokume gane polymer clay crackle veneer using plain printing paper to dry out the clay. It's a soft, subtle effect that's easy to create and use across any project. Try differ…
 -
Heatgun Mokume Gane Polymer Clay Crackle
 Today I'll be creating a mokume gane polymer clay crackle veneer using a heatgun. This is a fun, subtle technique that can be used in a wide range of projects. Try different colors and different thick…
 -
Swellegant Polymer Clay Crackle
 Today I'll be creating a polymer clay crackle veneer using just swellegant and polymer clay. It's easy as long as you follow the tips I include in the tutorial. You can also do the same thing if you p…
 -
Colorful Kroma Polymer Clay Crackle: Resin or Varnish
 Today I'll be creating a polymer clay crackle veneer with kroma crackle and I'll go into details regarding how to achieve color and how varnish and resin will affect the finished result. The tests are…
 -
99% Alcohol Cane Polymer Clay Crackle
 Today I'll be creating a polymer clay crackle veneer using a cheat crackle cane we made in day 15. Keep in mind you can use any cane for this technique ranging from the simplest bulls eye to a complex…
 -
Mokume Gane Polymer Clay Crackle
 Today I'll be creating another cheat polymer clay crackle; this time a metal leaf mokume gane. This is a fun technique and although I use a crackle texture in the video, you can use any texture you wa…
 -
Antiqued Heatgun Polymer Clay Crackle
 Today I'll be using a heatgun on some gold polymer clay to create a beautiful, rustic polymer clay crackle. We'll then mess around with some paint to antique the crevasse and finally we'll give it a b…
|
|
|
|
Facebook Group
Latest Posts
Tutorial Suggestions
QUESTIONS?
About Us
Contact Us
FAQ
LEGAL STUFF
Privacy Policy
Disclaimer
Disclosure


Copyright © 2018 All rights reserved
Copyright © 2018 All rights reserved
Please leave your comments below: