Easy Polymer Clay Leaf Pendants
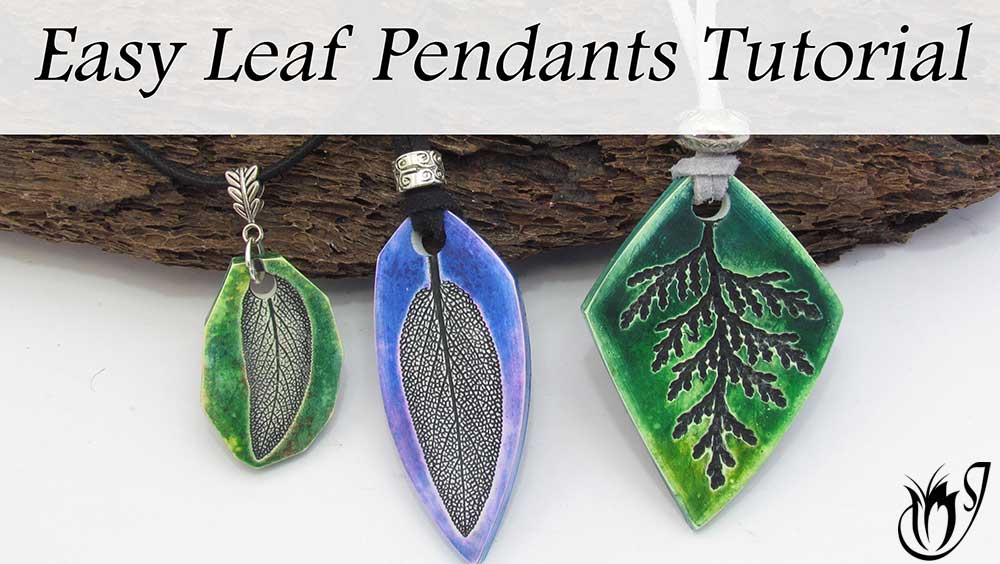
This polymer clay leaf pendants tutorial is an easy, quick project. Perfect for the markets or for gifts, these pendants are really fun to make, and super versatile.
In this tutorial, I have used pastels for the background and black paint for antiquing. You can try different leaves and paint colors, but why not also use mica powders, alcohol inks or even gilders paste instead of the pastels. You can also highlight the leaves with mica powder instead of antiquing them. The combinations are endless with this project. Have fun with your designs!
You will need the following supplies:
- White polymer clay
- Pastels
- Leaves (ones with pronounced veins)
- A tissue blade
- An acrylic roller
- A pasta machine
- An oven
- A craft knife
- A brush
- Paint
- A small circle cutter
- Renaissance wax
- A buffing tool (optional)
- Cords
- Large holed beads
- Clasps
- Cord ends
- Jumprings
Polymer Clay Leaf Pendants Step by Step
- First you need a block of Premo white clay, rolled out on the thickest setting(about 2mm) and then folded over on itself once to produce a sheet around 4mm thick.
- Next you need some leaves with good veins. I have sage, mint and a few others.
- Press one of your leaves, veins down, into the clay, and roll over with your acrylic rod. Cut this piece of clay away from the rest.
- Choose a few pastels of your choice and scrape them over the clay. I am using greens and browns.
- Tap the pastels down then smooth it with your fingertips.
- Brush away any excess pastel then cover the clay with paper and burnish.
- Use your flexible blade to cut out a random pendant shape, or use a cutter if you prefer.
- Lift from your tile, leaving the leaf in place. Turn over and dust the back with the same pastels. Brush along the sides too.
- Carefully remove the leaf.
- Use a micro circle cutter to make a hole at the top for stringing.
- Repeat the same process with different leaves and colors.
- Bake for an hour at the recommended temperature.
- Once cooled, brush your pendants with paint, being careful to get the paint into the veins. You can use any color. I am using black.
- Use a wet wipe to remove some of the paint. If you remove too much, just reapply. Allow to dry.
- Add a little alcohol to a wet wipe then rub around the edges of your pendant to remove some of your pastels to create highlights. Dry off with a tissue. You can also use sandpaper or polishing papers to remove some of the pastel.
- Apply a light layer of renaissance wax to the back, sides and front, being careful not to get clumps of wax in the veins.
- Buff using a soft cloth or a buffing wheel.
- Cut a length of black suede and attach a cord end to each end. Add a jump ring and clasp.
- Fold the cord in half, string on a spacer bead then thread though the hole in the top of your pendant. Open up the fold and thread the ends of the cord through it and tighten. Bring the spacer down.
- You can also use a pinch bail or a bail attached with a jump ring.
In the video tutorial I show quite a few variations of this technique using different colors and leaves, so please do take a look at that.
Suggested links
If I have missed something, or you still have questions, please leave a comment below.
You can like my Facebook page or join the Jessama Tutorials Polymer Clay Community on Facebook to stay up to date with more polymer clay tutorials like this one as they are released.



Please leave your comments below: