You are here: Home >> Polymer Clay Pendant Projects > Mayan Medallion
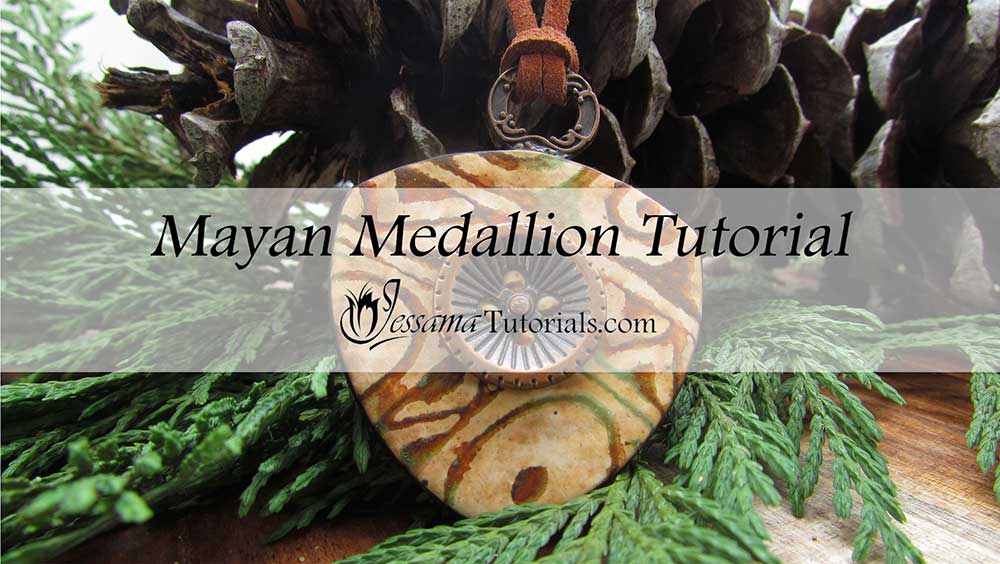
Mayan Polymer Clay Medallion Tutorial
This tutorial leads on from my Pills and Coffee Swellegant Veneer technique. In this second part I'll be showing you how to create what I call my Mayan Polymer Clay Medallion.
This tutorial includes tips on how to add buttons or focal pieces to your work, as well as a cool bail idea and a simple, but effective stringing technique that minimizes the need for fancy findings.
You will need the following supplies:
- Pills and Coffee Swellegant Silkscreen Veneer
- A tissue blade
- A pasta machine
- An acrylic roller
- The loop end of a
copper toggle clasp (for the bail)
- A copper button
- Black polymer clay
- A cutter (I’m using the Large SandDoller Cutters from JessamaDesign)
- An oven
- A texture for the back
of your pendant
- A ruler
- Gloves
- Translucent liquid polymer clay
- Suede cord
- Two large holed wooden beads
- E6000 glue
- Two copper jumprings
- A copper toggle clasp
How to Make My Mayan Polymer Clay Medallion Step by Step
Making the Medallion- To start with, you will need your Pills and Coffee Veneer from Part One of the Tutorial.
- Choose an appropriate cutter. (I will be using the smallest cutter in my Large SandDollar set on JessamaDesign.)
- Figure out roughly where you want to cut your veneer and place your copper button on the veneer so that it will sit in the center of your pendant. Push it down so that the clay pushes up through the button holes.
- Use your cutter to cut out your pendant piece, making sure that the button is in the center.
- Lift up your piece gently with a tissue blade, remove the button for now and clean up the edges.
- Roll out a sheet of black polymer clay on the thickest setting of your pasta machine.
- Texture it with a sponge or other texture of your choice.
- Flip the sheet over so that the texture is facing down.
- Using a ruler, make a mark across the clay and another mark perpendicularly to that. This is to help position the bail.
- Make a mark using your cutter. Line the corners of the cutter up with the marks you made in the clay to make sure that you can get your bail in the right place using the marks.
- I will be using the loop end of a toggle clasp for my bail, and I'm placing the loop inside the shape, on top of the horizontal mark and in line with the vertical mark. Press down to make a mark and remove. See the video for details.
- Use your cutter to cut through your clay where you marked it.
- Lift your clay gently with your tissue blade and smooth off the edges.
- Replace your bail.
- Place the front of your pendant over the top. Press the front and back gently together and smooth the sides. Don't push too hard around the bail, because we will be removing it again in a while.
- Use a drop of translucent liquid clay to secure your button to the pendant.
- Bake for 40 minutes at your brand's recommended temperature.
- Carefully remove the bail.
- Finish off the sides of the pendant using the Jessama Smear technique. Remember which side has the hole for the bail.
- When you are happy with the sides, resit your bail in the pendant and seal it with a drop of translucent liquid clay.
- Bake for another half an hour.
- A layer of matte varnish to seal the pendant is optional.
- String a piece of suede through the bail using a double loop. See the video.
- Line the suede pieces up and trim them to the same length.
- Use a bead reamer to make fairly large holes in your wooden beads.
- Slide one on each side of your suede.
- Add a jumpring to each side.
- One side at a time, fill your wooden bead with E6000 glue and fold your suede over your jumpring, into the wooden bead to make a loop.
- Attach your toggle clasp pieces to each side using the jumprings.
- Allow the glue to dry for 12-24 hours before wearing.
Suggested links
- Pills and Coffee Swellegant Silkscreen Veneer (Part One of this tutorial)
- Large SandDollar Cutters from JessamaDesign
- Jessama Smear Technique
- Debbie Crother's Tutorials
If I have missed something, or you still have questions, please leave a comment below.
You can like my Facebook page or join the Jessama Tutorials Polymer Clay Community on Facebook to stay up to date with more polymer clay tutorials like this one as they are released.
You may also like:
You are here: Home >> Polymer Clay Pendant Projects > Mayan Medallion





Please leave your comments below: