You are here: Home >> Polymer Clay Bracelets and Cuffs > Into the Congo Polymer Clay Bracelet Cuff
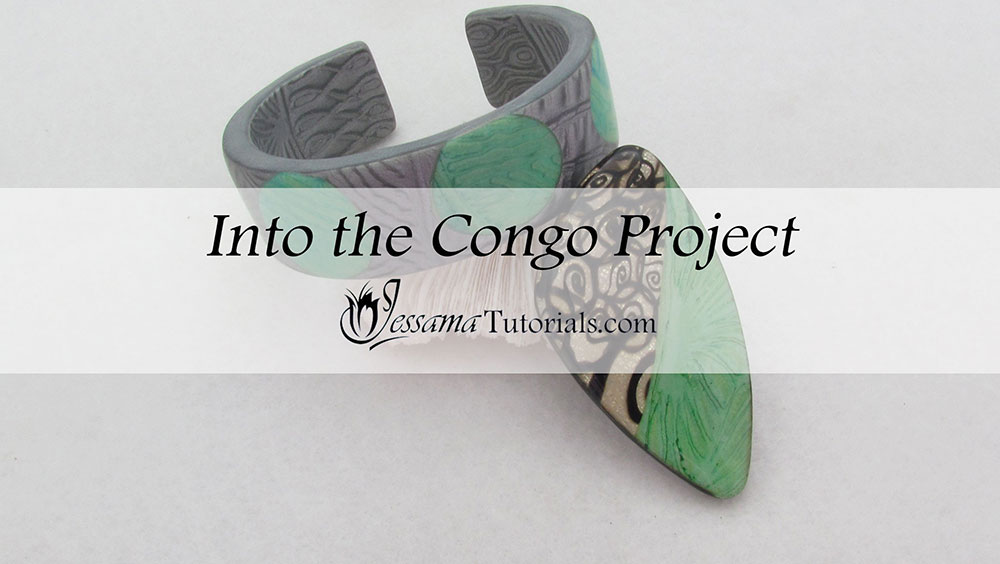
Into the Congo Polymer Clay Bracelet Cuff Project
In this two part project tutorial, I'll be showing you how to make a polymer clay bracelet cuff using a metal blank. The tutorial includes lots of tips and tricks to help get
your bangle smooth, and perfectly finished off around the edges and on
the inside. You can apply these techniques to any bangle project.
We will be using a veneer created using Helen Breil's Congo Line texture stamp, layered pastels and crackled paint, combined with a beautiful silver mica shift.
You will need the following supplies:
- White and silver polymer clay (I'm using Premo)
- Translucent polymer clay (I'm using Cernit)
- Pastels
- Americana white paint (any paint that crackles works)
- A rubber texture stamp (I'm using Helen Breil's Congo Line stamp)
- A bracelet cuff blank
- Sculpey Bake and Bond
- A tissue blade
- A pasta machine
- An acrylic roller
- A spray bottle of water
- A craft knife
- A small - medium circle cutter
- A brush
- An oven
- Course (40 grit) sandpaper
- Wet/dry sandpaper or polishing papers
- Renaissance Wax
Into the Congo Polymer Clay Bracelet Cuff Project - Part One
- To start you’ll need a sheet of white clay rolled out on the thickest setting of your pasta machine.
- Spray your chosen stamp with a bit of water or cornstarch and place the clay over it.
- Spray the surface of the clay with water and press the polymer clay into the stamp using your fingertips. Work from one side of the stamp to the other. This will help prevent air bubbles and expel any excess water.
- Give a quick roll over with your acrylic rod. Be careful of any lift ups. If your clay lifts, stop rolling, otherwise you will create a ghost image.
- Gently lift the clay from the texture.
- Dry your clay and your work surface.
- Apply a generous coat of pastels. Try using different colors and amounts. Experiment with this part of the tutorial. (I am using a blue-green color palette.)
- Brush the pastels into the clay so that they stick and brush away the excess. (See the video for more detailed instructions on layering your pastels.)
- Cover the raised surface of your textured clay with a thin layer of white paint using your fingertip. (I'm using Americana. You can use another brand, but it must crackle when dried, so do some tests first if you are using a different paint.)
- Apply three or four more layers until you have built up quite a thick coating. Be careful not to get the paint in the indents of the texture.
- Once the paint has dried, gently roll the texture flat using your acrylic roller. Roll in all directions to prevent distortion of the pattern. This will crackle the paint.
- Gently stretch your veneer using your hands, to encourage the paint to crack. Flatten again using your roller.
Into the Congo Polymer Clay Bracelet Cuff Project - Part Two
Covering the Veneer- To start you’ll need the veneer from part one, as well as a sheet of translucent polymer clay rolled out on the thinnest setting of your pasta machine.
- Lay the translucent sheet gently over the veneer, smoothing away the air bubbles as you go.
- Go back over the sheet carefully to make sure that you have eliminated all the air bubbles.
- Trim up the edges.
- Use your silver clay and the Helen Breil texture stamp to make a mica shift sheet. See my Mica Shift Tutorial for details if you haven't made one before.
- Cut several small circles from your pastel veneer and lay these to one side.
- Bring over your mica shift sheet and cut several circles of the same size out of it.
- Use the pastel circles to fill in the holes left in your mica shift.
- Roll over your mica shift sheet gently using your acrylic roller to flatten out your sheet and to eliminate the seams between the holes and the circles. Remember to roll in all directions to avoid distortion.
- Trim up the edges of the sheet.
- Roll another sheet of silver clay through your pasta machine at the thickest setting.
- Turn your mica shift sheet face down on your work surface. Cover the back with the silver sheet and smooth it down using your fingertips to make sure you have no air bubbles.
- Trim up the edges.
- You should now have a strip of silver mica shift embedded with textured pastel circles. This is what we will use to make the bracelet cuff.
- Starting at one end of the blank, wrap your clay strip around the blank, making sure that you are centering your circles over the blank.
- When your cuff is fully wrapped, gently press the clay and the cuff together all along the length of it, then peel the clay away. You should have created an impression on the clay the same size and shape as the blank.
- Use your craft knife or tissue blade to trim just around the outside of the lines left by the cuff impression.
- Rewrap the trimmed sheet around the blank, being careful to place it correctly.
- Gently press the clay onto the blank using your fingertips, bending the edges of the clay over the blank as you go.
- Trim away the excess clay on each side using your tissue blade. Keep your blade as flat as you can to avoid gouging.
- Trim off the ends of the cuff in the same way.
- Round off the corners of the clay into the shape of the cuff.
- Hold the cuff on the inside by placing it over your hand and gently smooth away any fingerprints using the pad of your other hand or the base of your finger.
- Go over the edges with your fingertips again to make sure they are tidy and smooth.
- Bake in the oven at the recommended temperature for a full hour.
- Sand the front of the cuff using your sandpaper or polishing cloths. Only go up to around a 1000 grit at this stage.
- Remove your clay bangle from the cuff blank by flicking up either end to pop it off. (See the video.)
- Scratch the inside of your cuff using rough sandpaper to give the raw clay, that we are going to add, something to grip onto.
- Spread an even, thin layer of Bake and Bond over the scratched surface. Add just enough to make it sticky.
- Make another sheet of silver mica shift the same as before.
- Trim the sheet to roughly the width of the cuff.
- Place the mica shift strip around the inside walls of the cuff sticking it down as you go. Make sure that the mica shift is facing out.
- One side at a time bend the excess edges of the clay over the baked clay.
- Trim off the excess using your tissue blade.
- Repeat for the ends.
- Go over the edges with your fingertips again to round them off and to make sure they are tidy and smooth.
- Hold the cuff on the outside and smooth over any fingerprints on the inside, using the base of your finger.
- Bake in the oven at the recommended temperature for another full hour.
- Remove your bangle carefully from the oven, after it has cooled, to avoid distorting its shape.
- Finish off the edges using The Jessama Smear Technique.
- Bake again for another half an hour.
- When cooled, sand the outside, inside and edges all the way up to the finest grits.
- Cover with a light layer of Renaissance Wax and buff using a soft cloth.
If you enjoyed this project, don't forget to check out the Into The Congo Pendant on Patreon.
Into the Congo Polymer Clay Bracelet Cuff Project - Part one
Into the Congo Polymer Clay Bracelet Cuff Project - Part Two
please like and share!
Suggested links
- Part Three - The Pendant
- How to do a Mica Shift
- The Jessama Smear Technique
- Helen Breil Texture Review
- Small to Medium Circle Cutters
- Buy Bangle Cuff and Helen Breil Stamp at Linda's Artspot
If I have missed something, or you still have questions, please leave a comment below.
You can like my Facebook page or join the Jessama Tutorials Polymer Clay Community on Facebook to stay up to date with more polymer clay tutorials like this one as they are released.
You may also like:
You are here: Home >> Polymer Clay Bracelets and Cuffs > Into the Congo Polymer Clay Bracelet Cuff


Please leave your comments below: