Basic Polymer Clay Leaf Cane Tutorial
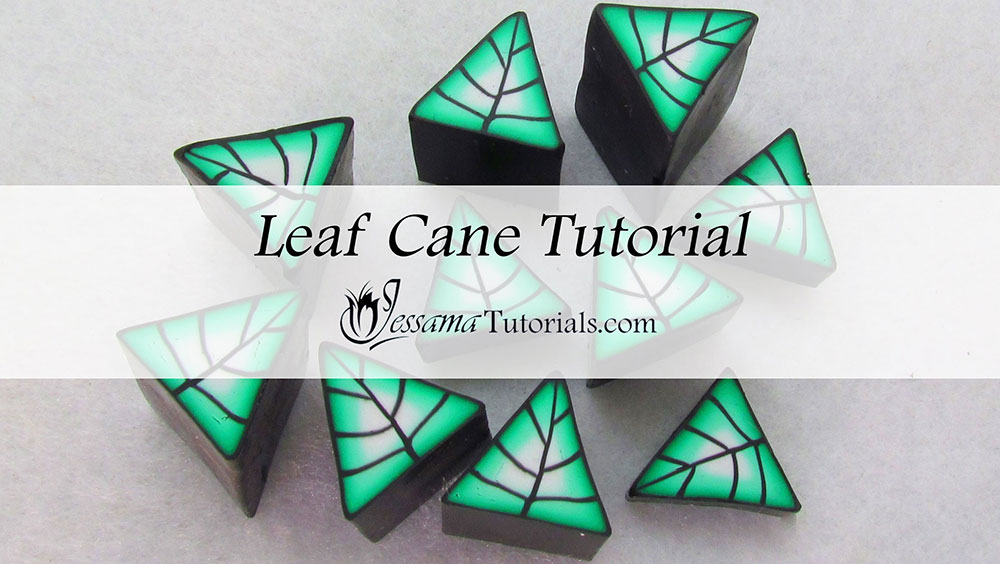
In this polymer clay tutorial I'll be showing you how to make a basic leaf cane. Simple leaf canes are an important stepping stone in learning how to create complex canes, as they are often used as elements in canes such as Kaliedoscopes or landscapes.
However, they can also be recreated into something more intricate in their own right and used alone. I'll be showing some of these more detailed canes in the future.
In order to make the cane in this tutorial, you'll need to know how to make a Skinner Blend and a Skinner Blend Bulls Eye Cane. You can find the links to these tutorials in the suggested links box below the video.
You will need the following supplies:
- Polymer Clay (I’m using black, white and green Kato)
- A tissue blade
- A pasta machine
- An acrylic roller
Steps To Making A Basic Leaf Cane
-
To start you’ll need a Skinner Blend Bulls Eye Cane. The Skinner Blend Bulls Eye Cane I’m using today is made from a Skinner Blend of white to green, rolled with the white at the core of the cane.
If you haven't made one before, see my Skinner Blend Bulls Eye Cane tutorial to see how.
You'll also need a sheet of black polymer clay rolled out on the second thinnest setting of your pasta machine.
- Start by molding your Skinner Blend Bulls Eye Cane into a triangle. Pinch the cane to form a point. While you’re pinching you should also be pushing down on your work surface so that you start to form the other two points. Once you’ve got a rough triangle shape define all three points. They don't need to be sharp, you can keep them nice and rounded.
- Start by turning your cane so that the image part of the cane is facing up. Now take a tissue blade and line it up so that you’re cutting the cane in half, from one of the points to the middle of the opposite flat side. This will allow space to insert the main vein of the leaf.
- Take one half of the cane and cut out sections, so that the cuts point towards the point of the leaf at an angle. I cut it so that I could insert three black veins.
- Lay one section at a time on your black polymer clay sheet and trim around the edges.
- Repeat for the other sections.
- Then press that half of the cane back together again.
- Repeat for the other half of the cane. Try to match up your cuts with the ones you added in the first half.
- Lay one half of the cane, middle facing down, on your black sheet of clay.
- Trim around it and gently lift it from your work surface.
- Press the entire cane back together lining the veins up as best you can. You should have a center vein and three veins on each side branching out from the middle.
- Take what’s left of your black sheet and wrap a strip around the outside of the leaf cane.
- Trim away any excess at the join so that you have one wrap around the cane.
- Use your fingertips to smooth over the seam.
- Now you need to start reducing the cane as a triangle. To do this start pinching one of the three corners and while you pinch gently pull out. Don’t pull too hard. You don’t want to crack the cane.
- Repeat for the other corners and so on until you’ve reduced the cane down to the size you like. It takes a while so be patient. Please see the video for the correct procedure.
- Trim off the ends to tidy up the cane.
suggested links
If you need more information on reducing your canes, take a look at my reducing polymer clay canes tutorial, where I show how to reduce round, square, triangular and hexagonal canes correctly.
If I have missed something, or you still have questions, please leave a comment below.
You can like my Facebook page or join the Jessama Tutorials Polymer Clay Community on Facebook to stay up to date with more polymer clay tutorials like this one as they are released.


Please leave your comments below: