Polymer Clay Brain Cane Tutorial
In this polymer clay
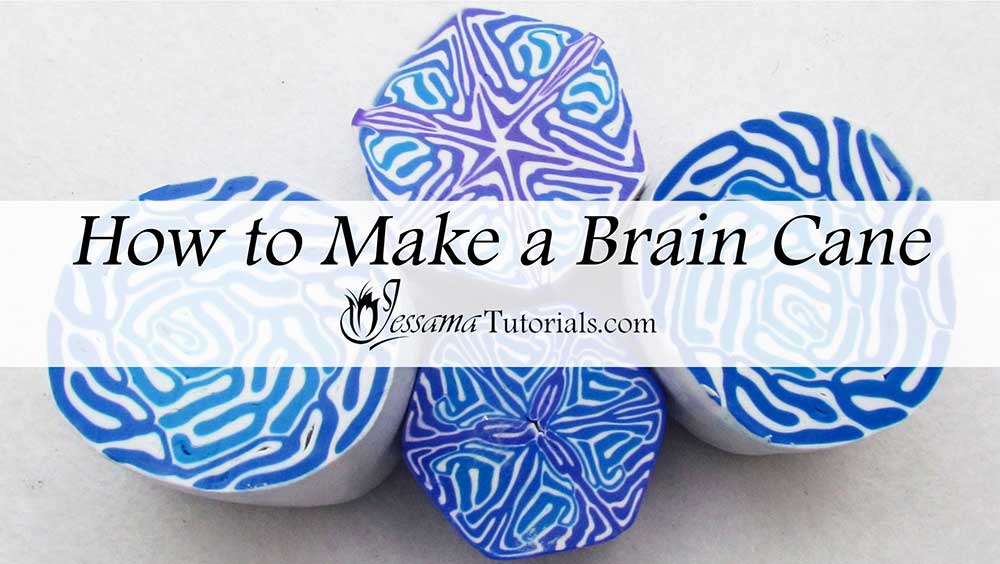
tutorial I’ll be showing you how to make a brain cane, also known as a squiggle cane. It’s really fun and easy
to do and can be used in many other polymer clay techniques as I’ll be showing in the
tutorial.
It’s a great cane if you are just starting out with polymer clay. It produces a cool result and it’s not easy to make a mistake so
it’s great for practice. I’ll also show you how to make Mokume Gane and a
kaleidoscope using the cane. I’m sure you’ll be surprised with the results.
This polymer clay tutorial incorporates a Skinner Blend. If you haven't
made one before, you'll need to watch the tutorial linked in
the box after the video before you watch this one.
You will need the following supplies:
- A polymer clay skinner blend (I’m using a skinner blend of Kato turquoise to Kato purple)
- A neutral color (I’ll be using Kato white)
- A tissue blade
- An acrylic roller
- A pasta machine
- A ruler
Steps To Making A Polymer Clay Brain Cane
- The first step is to get all of your polymer clay ready.
-
You will need a Skinner Blend rolled out on the thickest setting of your pasta machine. The skinner blend I’ll be working with is a blend between Kato turquoise and Kato purple.
See this tutorial to find out how to make a Skinner Blend.
- Next, you need a sheet of white polymer clay rolled out on the thickest setting of your pasta machine.
- Place the white on top of the skinner blend and trim any excess.
- Roll the sheet through the pasta machine on the thickest setting. Make sure to lengthen the sheet.
- Go down through the settings until you reach your third thinnest setting. Make sure to be lengthening the sheet on every setting.
- Now fold the sheet in a back and forth motion turning as you go to create the cane. Continue until you run out of clay. (See the video for more information.)
- Roll the log to squish out any air.
- Cut to expose your polymer clay brain or squiggle cane.
For Mokume Gane all you have to do is flatten out the cane, cut it and stack it. Stack it about three to four times and then press your chosen texture into it. Slice just like you would any other Mokume Gane stack.
For a kaleidoscope you need to turn your round brain cane into a triangle. Reduce the triangle until you can get six pieces out of it. Now line up the pieces into a hexagon so that you get a mirror image all around the cane.
Gently press the hexagon to get out any air bubbles and slice to see your polymer clay squiggle cane kaleidoscope.
I show all this and more in detail in the video tutorial so do take a look.
suggested links
- How to Make a Skinner Blend
- How to do a Mica Shift
- Kaleidoscope Cane Tutorial
- How to Make a Leftover Kaleidoscope Cane
- More Leftover Polymer Clay Techniques
If you need more information on reducing your canes, take a look at my reducing polymer clay canes tutorial, where I show how to reduce round, square, triangular and hexagonal canes correctly.
If I have missed something, or you still have questions, please leave a comment below.
You can like my Facebook page or join the Jessama Tutorials Polymer Clay Community on Facebook to stay up to date with more polymer clay tutorials like this one as they are released.


Please leave your comments below: