Basic Mokume Gane Polymer Clay Technique
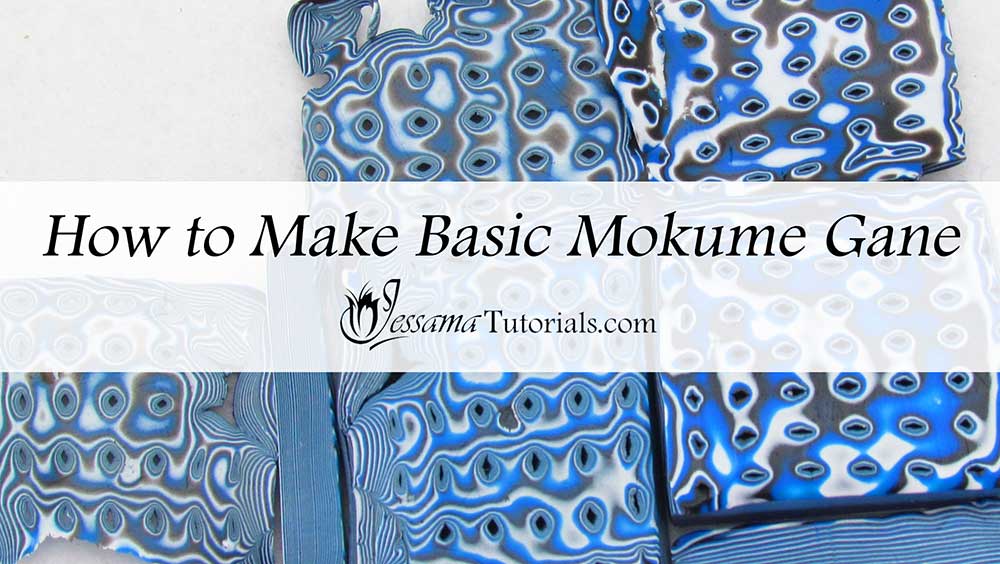
Create beautiful basic Mokume Gane every time, with the tips and tricks in this tutorial. Find out how your coloring, layering, imprinting and slicing, work together to make or break your end result, and how to vary these four factors to get different effects. Then go and play around and have fun.
Mokume Gane is a very well-known and much loved polymer clay technique for good reason. It presents endless creative possibilities. The mottled effect can be achieved randomly or in a more deliberate manner. It can involve few or many colors. It can be created using endless varieties of textures and patterns, and it can be adapted in many ways to create interesting variations as you will see in the other Mokume Gane tutorials on this site.
You will need the following supplies:
- Three or more polymer clay colors (I’m using Premo White, Cobalt and Black)
- Stamps, texture sheets, sculpting tools, piercing tools, etc (It’s really your choice)
- An acrylic roller
- A tissue blade
- A pasta machine
Steps To Making Basic Mokume Gane
-
To start, you’ll need to prepare your clay. You'll need one square of each of your chosen colors, conditioned and rolled through on your thickest pasta machine setting.
I will be using Premo White, Cobalt and Black. You can use any colors of your choice and more than three if you like. However, I do recommend with basic Mokume Gane that you do make one color either black or white. You can also use both. They help ground the Mokume Gane pattern. - Stack your squares one on top of the other. I’m placing blue on black and white on blue, but the order doesn’t really matter all that much.
- Run your stack through the pasta machine on the thickest setting. You want to lengthen the square.
- Trim off any areas of your polymer clay that look untidy. Usually it’s the shorter ends of the sheet that need trimming.
- Cut the sheet in half and stack. Throughout the Mokume Gane process take care to stack so that the same color is always facing up. Never have it so that white lays on white for example. This will mess up the pattern.
- Run the stack through the pasta machine from the short end to the short end. That way you’re lengthening the sheet. Trim the edges again.
- Cut in half and stack again.
-
Repeat this process until you are happy with the number of layers in your stack.
How many times you stack your sheet will dictate how intricate your pattern will be in the end. If you have a few stacks, the pattern will be wide open and more plain. If you have lots of stacks the pattern will look more busy. I show this in the video tutorial. - Cut your final sheet in four and stack again. This time you won’t run it through the pasta machine.
-
Now to decide which side of the stack you want to pattern and slice. In my case I could use the black or the white side.
The colors in your final Mokume Gane pattern will look different depending on which way up you use your stack, because of how the colors are stacked.
In my case, if I slice from the black side, my color layers are black, blue, white, black, blue, white. My blue will appear lighter because it’s on top of the white.
If I slice from the white side, my color layers are white, blue, black, white, blue, black. My blue will appear darker, because it’s on top of the black.
So you must take into account what colors are underneath each other as they will affect the color of the overall pattern. - Okay, so now it’s time for the fun part. You need to push texture into the clay stack. This will push and squish the layers and create the pattern. You can use cutters, texture stamps, molding tools. Anything will do. Look at the video tutorial to see some examples.
- Once you’ve pushed in your texture, squish the stack back together to close up any holes you might have made. For more detail on how to do this see the video tutorial.
- Give the polymer clay stack a quick roll with your acrylic roller to flatten out any bumps caused by the squishing.
- Now begin taking slices from your stack one by one until you reach the bottom. Each one will look different and can be used in different polymer clay projects.
If I have missed something, or you still have questions, please leave a comment below.
You can like my Facebook page or join the Jessama Tutorials Polymer Clay Community on Facebook to stay up to date with more polymer clay tutorials like this one as they are released.


Please leave your comments below: