Wood Grain Mokume Gane Tutorial with Gilders Paste
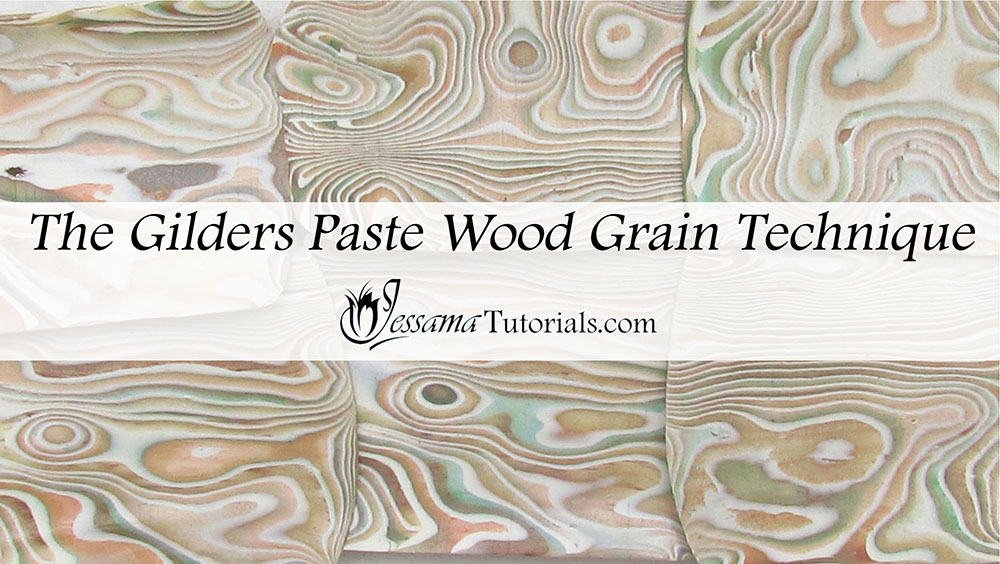
In this Mokume Gane tutorial I'll be showing you how to create a wood grain effect using gilders paste. It's a really simple and fun polymer clay technique and it yields stunning results.
It's a fun technique that
I’ve been playing around with for a little while now. In this tutorial I’ll just be using my fingers to
manipulate the clay, but a stamp would give a completely different effect. The result will vary depending on how you manipulate the layers.
Play
around with this technique and see what results you can get. Who knew gilders
paste and Mokume Gane could look so good?
You will need the following supplies:
- White and translucent polymer clay (I’m using Premo)
- Gilders paste (I’m using Inca Gold, Copper, Silver, Sandal Wood, Verdigris)
- A small square cutter
- A tissue blade
- An acrylic roller
- A pasta machine
Steps To Making Wood Grain Mokume Gane
- To start, you’ll need to prepare your clay. You'll need ten squares of translucent and five squares of white, conditioned and rolled through on your middle pasta machine setting.
- Now rub each of the white squares with a different color of gilders paste.
- Do the same for the translucent except that you'll rub two squares with each color of gilders paste.
- Now you’re ready to stack. Do it in any way you wish color wise, but make sure that you go two translucent, one white, two translucent, one white until you run out of squares.
- Squish the stack down into a long rectangle around 1.5cm thick. Do this using your fingers rather than your roller. You want your finger indents in the clay because the indents are what creates the effect we are looking for.
- Now cut your stack it in half and stack again. Squish again.
- Repeat this process another three times. Make sure you push your fingers into the stack while squishing it down as it will manipulate the layers.
- Once done, push your finger tips a few more times into the clay to distort the layers a bit more, square your stack up again and let it rest for a few minutes.
- Once rested you should cut the stack from the top or bottom of the square layers, not from one of the sides. If you cut from one of the sides you’ll get a bunch of lines and not a wood marble look.
- Continue cutting through the stack. Notice how each slice is different. Once done you can use the slices in any polymer clay project you wish. Make sure to use your slices relatively quickly, because the gilders paste will begin to soak into the raw clay and discolor it, and you'll lose a lot of the definition between the layers.
suggested links
If I have missed something, or you still have questions, please leave a comment below.
You can like my Facebook page or join the Jessama Tutorials Polymer Clay Community on Facebook to stay up to date with more polymer clay tutorials like this one as they are released.


Please leave your comments below: