You are here: Home >> Polymer Clay Mokume Gane Tutorials > Ripple Blade Mokume Gane
Ripple Blade Mokume Gane tutorial
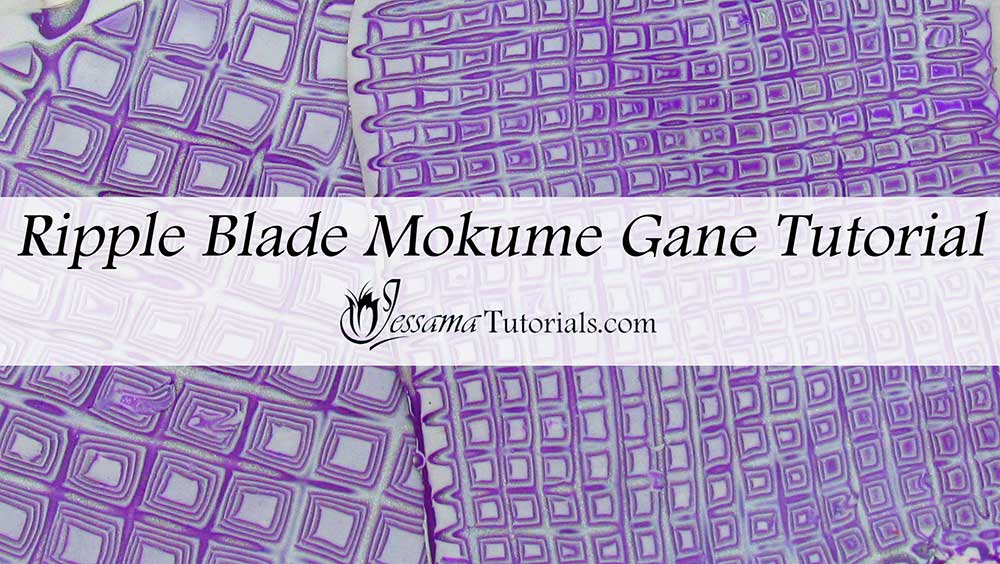
In this polymer clay tutorial I’ll show you a cool, ripple blade Mokume Gane. The method shown will give an interesting geometric, 3D square effect.
This polymer clay technique can be
used with fresh clay or a stack made with leftovers. It’s fun, easy and
looks great.
I also show ways of using up the leftovers from this technique to
create a fascinating veneer.
You will need the following supplies:
- Two or more polymer clay colors (I’m using Premo White, Purple and Silver)
- An acrylic roller
- A tissue blade
- A ripple blade with wide waves
- A ripple blade with narrow waves
- A pasta machine
Steps To Making Ripple Blade Mokume Gane
-
To start, you’ll need to prepare your clay. You'll need one square of each of your chosen colors, conditioned and rolled through on your thickest pasta machine setting.
I will be using Premo White, Purple and Silver. You can use any colors of your choice and more than three if you like. - Stack your squares one on top of the other.
- Run your stack through the pasta machine on the thickest setting to lengthen the square.
- Cut the sheet in half and stack. Throughout the Mokume Gane process take care to stack so that the same color is always facing up. Never have it so that white lays on white for example. This will mess up the pattern.
- Run the stack through the pasta machine from the short end to the short end. That way you’re lengthening the sheet.
- Cut in half and stack again.
- Repeat this process until you have enough layers in your stack. The number of layers in your stack will dictate the business or simplicity of your pattern.
- Cut your final sheet in two.
- Tidy up the edges of your sheets using your fingertips.
- Put one piece aside.
- For this polymer clay technique you need to use your wider ripple blade.
- Gently press the clay onto your work surface white side up.
- Take your ripple blade and shave in one direction across your sheet. Try to get evenly spaced lines.
- Save all the pieces that you shave off.
- Be sure to keep your work area and blades clean while you are working because this technique does result in a lot of small pieces of clay dropping all over the place.
- You can use your Mokume Gane as is or flatten it out. Alternatively progress to the next step.
- Turn your clay 90 degrees and shave lines perpendicular to the other ones so that you now have squares.
- Use as is with the raised texture, or flatten gently with your roller by rolling evenly in all directions.
- For this polymer clay technique you need to use your wider ripple blade.
- Gently press the other half of your clay sheet onto your work surface white side up.
- As before, use your ripple blade and shave in one direction across your sheet. Try to get evenly spaced lines.
- Save all the pieces that you shave off.
- Again, you can use your Mokume Gane as is or flatten it out. Alternatively progress to the next step.
- Turn your clay 90 degrees and shave lines perpendicular to the other ones so that you now have squares again.
- Use as is with the raised texture, or flatten gently with your roller by rolling evenly in all directions.
- Roll out a sheet of white polymer clay on your third thinnest setting.
- Lay the leftover pieces across the white in whatever pattern you prefer. You can choose a random pattern or do something more precise and geometric.
- Gently flatten your sheet by rolling with your acrylic roller gently in all directions.
If I have missed something, or you still have questions, please leave a comment below.
You can like my Facebook page or join the Jessama Tutorials Polymer Clay Community on Facebook to stay up to date with more polymer clay tutorials like this one as they are released.
You may also like:
You are here: Home >> Polymer Clay Mokume Gane Tutorials > Ripple Blade Mokume Gane



Please leave your comments below: