You are here: Home >> Polymer Clay Bezels and Settings > Polymer Clay Fractals Pendant Tutorial
Polymer Clay Fractals Pendant Tutorial
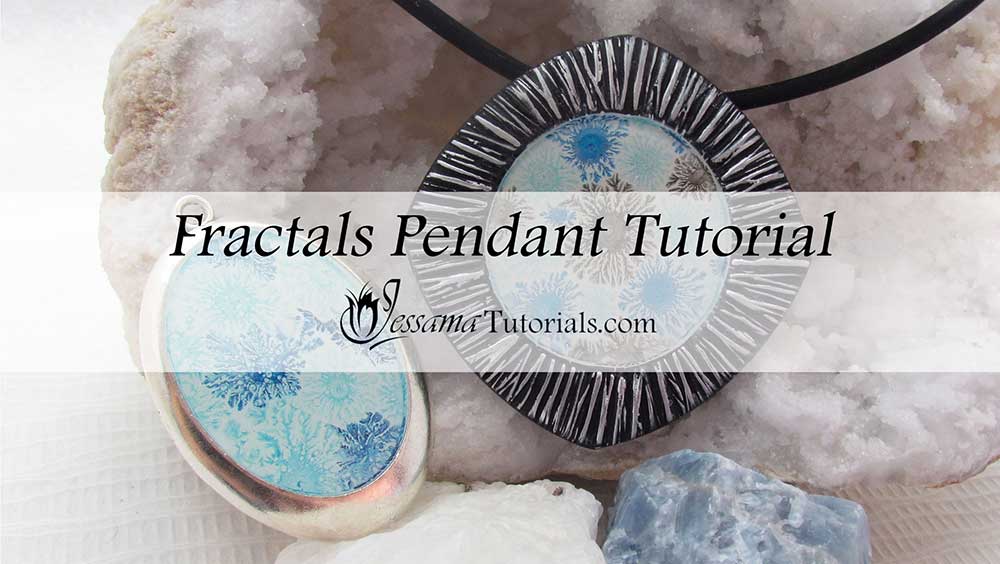
In this Polymer Clay Fractals Pendant tutorial, I'll be showing you how to make your own bezel out of polymer clay, and how to create paint and ink fractals in the center.
These bezels can be used to create all sorts of cool pendants. I'll be doing more tutorials around this idea in the coming months.
You will need the following supplies:
- Black polymer clay (I’m using premo)
- Silver mica powder
- Cutters (I’m using my rounded squares and circles)
- A texture stamp (I'm using my Frozen Fractures stamp)
- A spray bottle of water
- White Paint
- Acrylic Inks
- 99% alcohol
- Floetrol
- A tissue blade
- A pasta machine
- An acrylic roller
- An oven
- Wet/Dry Sandpaper or Polishing Papers
- Renaissance wax
- A soft buffing cloth
- Ice Resin
- Premade rubber cord necklace
How to Make A Polymer Clay Fractals Pendant
Making the Polymer Clay Bezel- To start with, you need a sheet of black polymer clay (I'm using Premo) run through the thickest setting of your pasta machine.
- Texture the clay using your chosen texture stamp. I'm using my frozen fractures stamp. See the video for tips on how to get the best imprint.
- Roll out a second sheet of black clay on the thinnest setting of your pasta machine and put it behind the textured sheet as a backing.
- Trim up your clay.
- Decide what shape you would like your bezel to be and choose a set of cutters. You need two cutters of the same, or different shapes, one larger than the other. I'll be using my Rounded square and circle cutters today.
- Take your smaller cutter and cut into your clay sheet. Remove the cutter, but leave the clay in place.
- Use your larger cutter to cut around the first cut to create a border.
- Recut the middle using the smaller cutter, then remove this piece with the tip of your craft knife. You should be left with just a border in the shape of your cutter.
- Clean up the edges.
- Lay your border piece over another sheet of black clay rolled out on your second thinnest setting.
- Use your rounded square cutter to cut around the shape, then clean it up with your blade.
- Smooth off the sides with your fingertips.
- Spread a good layer of silver mica powder over the border of your clay.
- Roll out another sheet of black clay on the middle setting of your pasta machine and texture it as before with your chosen texture stamp.
- Put it on the back of your piece as a backing and use your cutter again to cut it out and smooth off the edges.
- Spread a good layer of silver mica powder over the back of your piece to highlight the texture.
- Trim a piece of black clay from a sheet rolled out on the middle setting of your pasta machine for a bail.
- Wrap it around a skewer and trim off any excess.
- Stick your bail to the back of your piece by gently pushing it on with the skewer.
- Finish it off with mica powder.
- Bake for a full hour at the recommended temperature.
- Give the back, sides and frame a good sand, starting with a 400 grit, and going all the way through to the higher grits.
- Add a light layer of renaissance wax to the front, sides and back of your bezel.
- Give a good buff with a soft polishing cloth and allow the renaissance wax to cure for at least ten minutes.
- For this part you will need a measuring cup, some white paint, Floetrol, water and acrylic inks and 99% alcohol.
- Squeeze a good bit of paint into your cup and then water it down to the consistency of thick cream.
- Add about 2 parts Floetrol to 1 part paint.
- Mix thoroughly.
- Fill your baked bezel with a thin layer of the paint mixture. Spread it to the sides and allow it to level out.
- Drop a few drops of ink onto a piece of plastic or a small mixing dish and spray on a little 99% alcohol. Mix.
- Apply small drops to your white paint in the bezel using the end of a skewer.
- Repeat with other colors.
- See the video for details and some other fun tricks.
- Leave to dry for at least 24 hours.
- Fill your bezel with Ice Resin. See the video for the process. I also have an Ice Resin Tutorial for step by step help if you struggle with resin.
- Allow to cure for 24 hours.
- String your polymer clay fractals pendant on the premade rubber cord necklace.
Suggested links
- Rounded Square Cutters
- Circle Cutters
- Frozen Fractures Stamp
- More Stamps on JessamaDesign
- Buy the Ice Resin Plunger at Linda's Art Spot
- Premade Rubber Cord Necklace on Firemountaingems.com
If you are struggling with the Ice Resin, you can find a full Tips and
Techniques tutorial that walks you through the process on my Patreon community page or in my Etsy Shop.
If I have missed something, or you still have questions, please leave a comment below.
You can like my Facebook page or join the Jessama Tutorials Polymer Clay Community on Facebook to stay up to date with more polymer clay tutorials like this one as they are released.
You may also like:
You are here: Home >> Polymer Clay Bezels and Settings > Polymer Clay Fractals Pendant Tutorial


Please leave your comments below: