


Winter Frost Polymer Clay Project
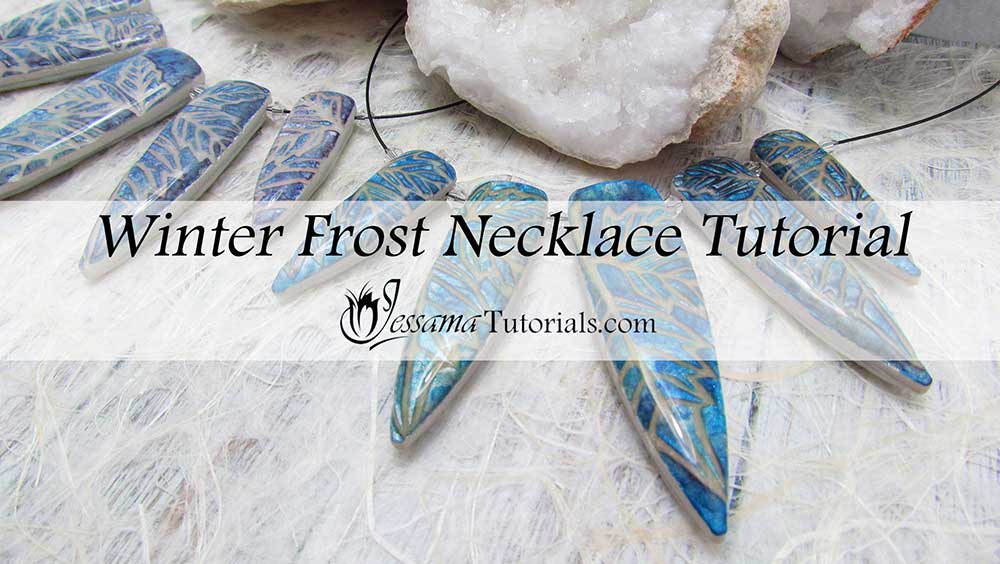
Here is a beautiful winter themed polymer clay project using textures and alcohol inks. In the tutorial I show you how to create your own texture stamps, so that you’ll be able to make your own unique stamps for your
project.
This project is easy and versatile. You can change it from being a winter themed project to
any season you want just by changing the colors.
I use resin and liquid clay in this tutorial to
add a level of depth to the piece that looks stunning. I highly recommend
using them, but you can create beautiful pieces without them too.
You will need the following supplies:
- Pearl white polymer clay
- A tissue blade
- A pasta machine
- An acrylic roller
- An oven
- A craft knife
- Leftover polymer clay (Optional)
- A piercing pin (Optional)
- Leaves (Optional)
- A Sycamore Leaf or homemade texture stamp
- Translucent liquid clay (kato)
- Alcohol ink (Adirondack Sailboat Blue, Stonewashed, Denim, Cloudy Blue)
- A piece of felt to dab alcohol ink
- Sandpaper
- Cutters (I'm using Rounded Daggers)
- Heat Gun (Optional)
- Magic gloss (or Ice Resin)
- A pin drill
- Accu-flex
- Two charlotte crimps
- Two crimps
- A clasp
- Pliers
Winter Frost Polymer Clay Project Step by Step
Making Your Own Texture Stamp - Optional- Please note: If you don't want to make your own stamp, the one I show in the tutorial is available on my shop JessamaDesign.
- First you’ll need a piece of leftover clay rolled out on the thickest setting on your pasta machine and some leaves with prominent veins.
- Dust your clay with cornstarch.
- Press one of these leaves into your leftover polymer clay.
- Cover with paper and burnish with your acrylic roller to make sure you get a clear impression of the leaf.
- If your impression isn’t very deep you’ll need to carve out your texture using a piercing pin. Simply trace out the lines left by the imprint the leaf made.
- Once done carving, gently stretch the clay to widen the lines you’ve carved.
- Cut your stamps to size and bake for a full hour at your brand's recommended temperature.
- Once baked, dust the stamp with cornstarch and press in some more leftover clay to create a reverse stamp.
- Bake this for an hour and this is the stamp we’ll use.
- To start your Winter Frost project you’ll need some pearl white clay run out on your thickest setting.
- Dust the pearl white and stamp with cornstarch and press the clay into the stamp. Lift the clay from the stamp.
- Cut out your pendants using your chosen cutters. I will be using my rounded dagger cutters from JessamaDesign. You might need to restamp a few times to get enough pendants. I cut out five.
- Now take your ink pad and dab each of your alcohol ink colors onto it in dots. Then dab the ink pad onto your clay. Be gentle. You don’t want to get ink into your texture. You just want to outline the texture.
- Gently heat gun the top of your pendant to bake the top. This will set the ink. You can bake the piece for 5 minutes in the oven if you don’t have a heat gun.
- Ink again after the baking. Set again for 5 minutes in the oven or set with the heat gun.
- The next part is optional, but adds a lot of depth. Take some translucent liquid clay and apply a very thin layer over the top of the pendants. Bake the pieces for a half hour in the oven at your brands recommended temperate. If you have a heat gun, set the liquid clay before putting the piece in the oven.
- Repeat the process for all your pendants.
- Take a sheet of pearl white and cut out the shape of each of your pendants. Smooth this pearl white against the back of your pendants.
- Trim around the sides and texture. Smooth the edges and place in the oven for another half an hour.
- Once baked you can drill your pieces with a pin drill.
- Place the pendants on a resin mat and apply your UV resin. Allow the resin to cure for the correct amount of time under the UV lamp. (If you added liquid clay, you don’t have to apply the resin if you don’t want to, as the liquid clay will act as a varnish and sealer. However the resin will add a lot of depth.)
- Sand the backs and sides of the pendants to a high shine.
- String your pendants onto your accu-flex with your chosen beads and attach your findings and clasp.
Play around with this technique. You can use other textures and colors to achieve a completely different result.
Suggested links
If I have missed something, or you still have questions, please leave a comment below.
You can like my Facebook page or join the Jessama Tutorials Polymer Clay Community on Facebook to stay up to date with more polymer clay tutorials like this one as they are released.
You may also like:


Become a Member

Join my Facebook Group

Find Me on Etsy

What's New?
-
Dry Clay Polymer Clay Crackle
 Today I'll be creating a mokume gane polymer clay crackle veneer using plain printing paper to dry out the clay. It's a soft, subtle effect that's easy to create and use across any project. Try differ…
 -
Heatgun Mokume Gane Polymer Clay Crackle
 Today I'll be creating a mokume gane polymer clay crackle veneer using a heatgun. This is a fun, subtle technique that can be used in a wide range of projects. Try different colors and different thick…
 -
Swellegant Polymer Clay Crackle
 Today I'll be creating a polymer clay crackle veneer using just swellegant and polymer clay. It's easy as long as you follow the tips I include in the tutorial. You can also do the same thing if you p…
 -
Colorful Kroma Polymer Clay Crackle: Resin or Varnish
 Today I'll be creating a polymer clay crackle veneer with kroma crackle and I'll go into details regarding how to achieve color and how varnish and resin will affect the finished result. The tests are…
 -
99% Alcohol Cane Polymer Clay Crackle
 Today I'll be creating a polymer clay crackle veneer using a cheat crackle cane we made in day 15. Keep in mind you can use any cane for this technique ranging from the simplest bulls eye to a complex…
 -
Mokume Gane Polymer Clay Crackle
 Today I'll be creating another cheat polymer clay crackle; this time a metal leaf mokume gane. This is a fun technique and although I use a crackle texture in the video, you can use any texture you wa…
 -
Antiqued Heatgun Polymer Clay Crackle
 Today I'll be using a heatgun on some gold polymer clay to create a beautiful, rustic polymer clay crackle. We'll then mess around with some paint to antique the crevasse and finally we'll give it a b…
|
|
|
|
Facebook Group
Latest Posts
Tutorial Suggestions
QUESTIONS?
About Us
Contact Us
FAQ
LEGAL STUFF
Privacy Policy
Disclaimer
Disclosure


Copyright © 2018 All rights reserved
Copyright © 2018 All rights reserved
Please leave your comments below: