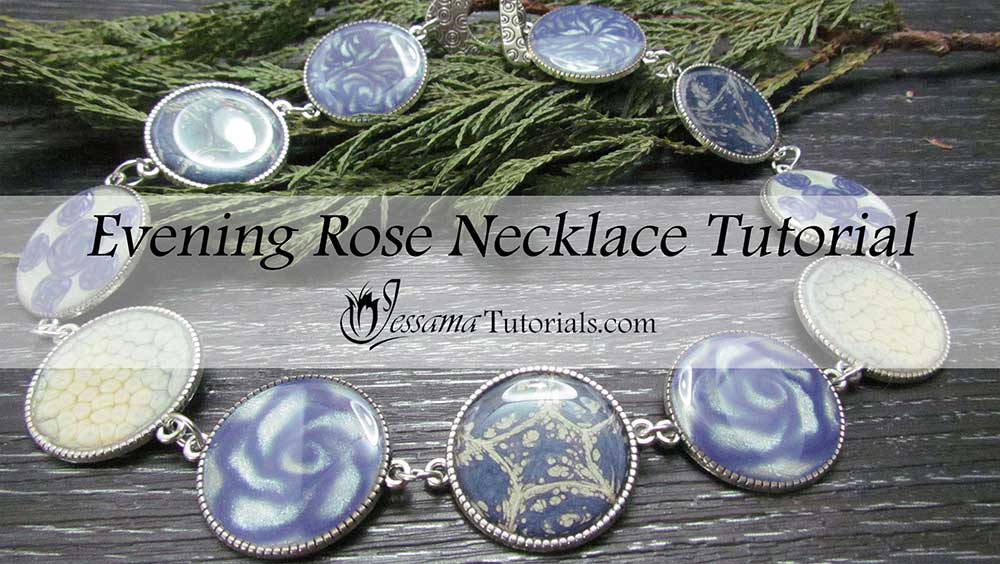
Evening Rose Polymer Clay Necklace Tutorial
In this easy polymer clay necklace tutorial
we will be using silver link bezels filled with rose canes and pebeo paints.
You can fill the bezels with any polymer clay cane or paint that you want to, so this is a really simple, versatile project that you can play around with to create lots of different designs.
If you want to use the evening rose cane that I am using, you will need to watch that tutorial before this one. The link is in the suggested links box below the video.
You will need the following supplies:
- Evening Rose cane
- A tissue blade
- A pasta machine
- An acrylic roller
- An oven
- Silver bezel links
- Skewers
- Pebeo paint (Ash Blue prisme, Eggshell White prisme, Metal Blue moon)
- Plain printing paper
- Pearl white polymer clay
- Circle cutters
- Sandpaper
- Ice resin
- Silver jumprings
- A clasp
- Pliers
Evening Rose Polymer Clay Necklace Tutorial
- To start this polymer clay necklace project you’ll need some silver link bezels, pearl white polymer clay and the evening rose cane from part one of this tutorial.
- Take a thickish slice of the cane and stretch it a bit before placing in the link. Press down with your fingertips and squish it out towards the edges.
- Cover with a piece of paper and burnish flat.
- Repeat to make a second one and bake for half an hour at the recommended temperature.
- Cut a small circle from a sheet of pearl white polymer clay and place in a silver link bezel. Press out to the edges. (I'm using my circle cutters from JessamaDesign.)
- Reduce a piece of your rose cane to three different smaller sizes.
- Lay a few different size slices on the pearl white.
- Cover with a piece of plain paper and burnish.
- Repeat to make a second one and bake for half an hour at the recommended temperature.
- Cut a few slices from one of your reduced rose canes.
- Lay the slices around the edge of the bezel, overlapping them.
- Cover with plain paper and burnish flat.
- You may need to spread it out to the edges with your fingers and burnish again.
- Repeat to make a second one and bake for half an hour at the recommended temperature.
- For this part of the project you will need Pebeo paints to match your polymer clay rose cane. I'm using Ash Blue and Eggshell White Prisme and Metal Blue Moon.
- Mix your paints thoroughly.
- Design One: Add some Eggshell white to two of your silver links.
- Add some Ash Blue to the outside.
- Drag the white through the blue using a piercing pin.
- Design Two: Add some Ash Blue to the middle of two more silver bezel links and drag to the sides.
- Add a few drops of Metal Blue.
- Design Three: Add Eggshell white to one silver link bezel and drag to the edges.
- Add a few drops of Metal Blue.
- Leave to cure for about twelve hours.
- Sand the bezels with the rose cane centers starting from the lowest grit and working your way up.
- Measure out your Ice Resin. I use a plunger to make sure that the measurements are accurate.
- Mix thoroughly but gently - around five minutes.
- Lay your bezels out on a resin tray and drip the resin into the centers using a skewer. Don't over-fill them. Add a bit at a time and stretch it out towards the edges.
- Blow gently through a straw to pop the bubbles.
- Allow to cure for 24 hours.
- Check out my Ice Resin Tutorial for more information.
- Lay your links out in the order you like and link them together with silver jumprings.
- Add your clasp to the end links with jumprings.
Play around with this technique. You can use other canes, colors and paints to achieve different effects.
Suggested links
- Evening Rose Cane Tutorial
- Graduated circle cutter set
- Painted Art Pebeo Polymer Clay Pendant Tutorial
If you are struggling with the Ice Resin, you can find a full Tips and Techniques tutorial that walks you through the process on my Patreon community page or in my Etsy Shop.
If I have missed something, or you still have questions, please leave a comment below.
You can like my Facebook page or join the Jessama Tutorials Polymer Clay Community on Facebook to stay up to date with more polymer clay tutorials like this one as they are released.


Please leave your comments below: