How to Make Polymer Clay Twisted Branches Jewelry
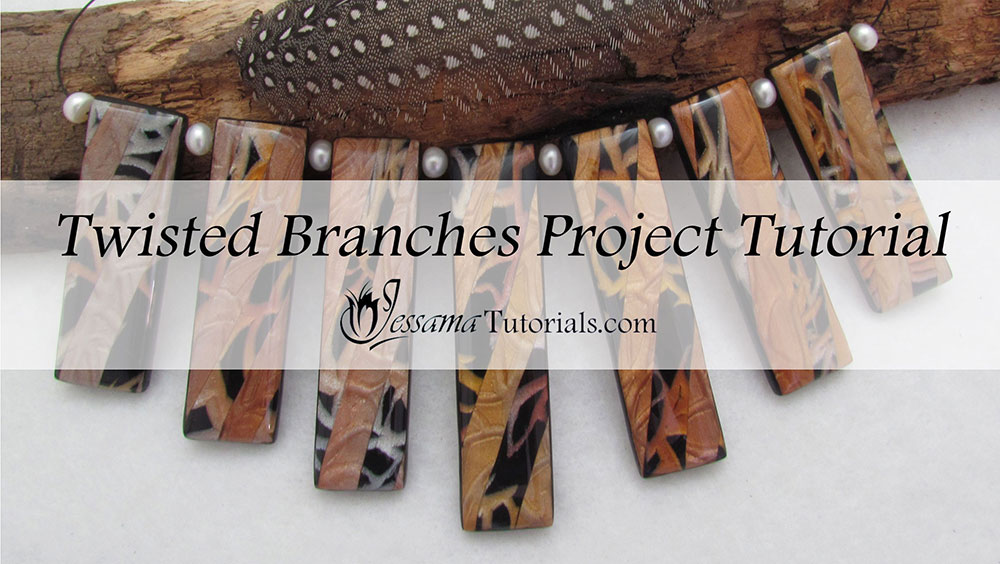
In this tutorial I'll show you how to make polymer clay twisted branches jewelry using a combination of several of my favorite mica clay techniques. This is a follow on from my Mica Frills and Mica Smash tutorials.
In order to complete this project, you will need the Mica Shift sheet and the Mica Frills sheet from my Mica Frills tutorial, as well as a Mica Smash sheet . You will find the links to the tutorials for these techniques in the suggested links box below the video.
You will need the following supplies:
- A mica smash sheet
- A mica frills sheet
- A mica shift sheet
- Black polymer clay (I’m using premo)
- A tissue blade
- A pasta machine
- An acrylic roller
- An oven
- Cutters (I’m using my rectangular ones from JessamaDesign)
- A craft knife
- Sandpaper or polishing papers
- Ice resin
- Black accu-flex
- Renaissance wax
- A pin drill
- 8 white pearls
- A silver clasp
- 2 silver jumprings
- 2 silver charlotte crimps
- 2 silver crimps
How to Make Polymer Clay Twisted Branches Jewelry Step by Step
- To start with, you will need the two sheets from my Mica Frills tutorial which we made using the Winter Frost Kor Roller.
- Roll both sheets through the middle setting on your pasta machine.
- Trim up the edges of the sheets.
- Cut your sheets into strips. They don't all have to be equal, just clean random strips.
- Lay the strips next to one another, alternating between the sheets, until all of the strips are used up.
- Roll the sheet flat using your acrylic roller. Roll in the direction of the stripes first, then gently roll in the other direction. Keep going until the sheet is nice and flat.
- Roll out a sheet of black clay on the thickest pasta machine setting.
- Lay the striped sheet carefully over the black and smooth down to eliminate air bubbles.
- Roll this sheet through the thickest setting again.
- Cut pieces out of the sheet using your chosen cutters. (I am using the rectangles from JessamaDesign.) Cut the pieces so that the stripes sit at an angle across the pieces.
- For the backing we will be using the sheet from my Mica Smash Tutorial.
- Roll the sheet through your pasta machine on the second thinnest setting.
- Lay the sheet on your baking tile or surface and then gently smooth each striped piece onto the sheet. Cut them out again using your cutters.
- Run the edge of your flexible blade along the edges of each piece to clean up the edges.
- Don't move your pieces as you want to avoid any distortion. Bake them on your working tile for a full hour at your brand's recommended temperature.
- Finish off the edges of your beads with black clay using the Jessama Smear Technique.
- Bake again for another half an hour.
- Once cool, sand your beads to a high shine using wet/dry sandpaper or polishing papers, starting from the lowest grit to the highest. I start from 400 all the way up to 8000. Alternatively, you can use the Polyfast sanding tool starting from the 500 grit to the 8000 grit.
- Sand the backs, fronts and sides.
- Drill holes through each pendant using a pin or push drill.
- Add a light layer of Renaissance Wax to the sides and backs of your pendants using a soft cloth. Be careful not to get it on the front. Give the sides and backs a good buff.
- Add a layer of Ice Resin to the fronts. For a step by step walk through on using Ice Resin, please see my Ice Resin Tutorial.
- Allow the resin to cure for 24 hours.
- String one end of your Accuflex with a charlotte crimp and a crimp. Add a jumpring and a clasp. See the video for details.
- String your pendants on the Accuflex. I am alternating mine with white pearls, but you can add any spacers.
- Finish off the other end of the Accuflex in the same way as you did the first end.
Suggested links
- How to Make Polymer Clay Mica Frills
- Mica Smash Technique
- Jessama Smear Tutorial
- Desert Jewel Tiger Eye Tutorial on JessamaDesign
- Desert Jewel Tiger Eye Tutorial on Patreon
Suggested links
If you are struggling with the Ice Resin, you can find a full Tips and Techniques tutorial that walks you through the process on my Patreon community page or in my Etsy Shop.
If I have missed something, or you still have questions, please leave a comment below.
You can like my Facebook page or join the Jessama Tutorials Polymer Clay Community on Facebook to stay up to date with more polymer clay tutorials like this one as they are released.


Please leave your comments below: