Love Letter Polymer Clay Pendants Tutorial
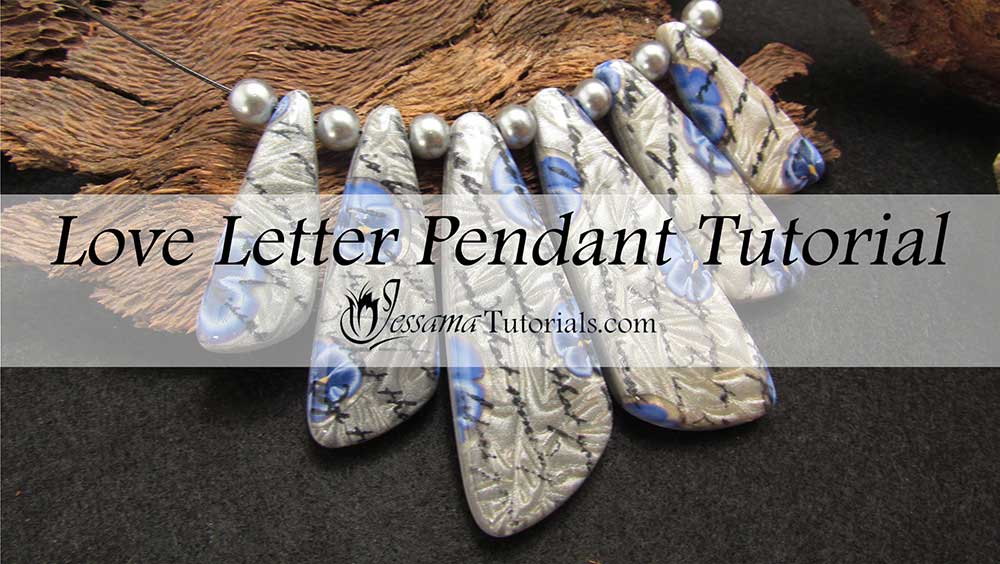
In this polymer clay tutorial we'll combine a Skinner blend mica shift, with a beautiful Pansy flower cane and some simple black ink stamping to create these beautiful polymer clay pendants.
You could use the veneer to create a similar multi-piece necklace, or use it to make cabochons, a statement pendant, a bangle or even a collar necklace. The choice is yours.
You will need the following supplies:
- Silver and pearl white polymer clay
- Lisa Pavelka’s foliage texture stamp
- A flower cane
- Lisa Pavelka’s love letter texture stamp
- Stazon ink - black
- A tissue blade
- A pasta machine
- An acrylic roller
- Cutters (I'm using my Borneo set)
- Oven
- Sand paper
- A pin drill
- Ice resin
- Accu-flex
- Silver pearls or spacer beads
- Silver crimps
- Silver charlotte crimps
- Silver clasp
- Pliers
How to Make Love Letter Polymer Clay Pendants Step by Step
- To start this polymer clay project you’ll need a two part Skinner Blend going from silver to pearl white.
- The sheet should be rolled out on the thickest setting of your pasta machine.
- Imprint your clay using your chosen texture stamp. I'm using Lisa Pavelka's Foliage stamp.
- Lay your stamp face up on your tile. Spray it with water. Now take your skinner blend and lay it on top of the stamp. Spray the top of the clay with water. Now press the clay into the stamp using your fingertips. Lift the clay from the stamp and dry up the water.
- Trim up the edges.
-
Now you need to shave the top off with your flexible tissue blade to create a mica shift.
Check out my Mica Shift Tutorial for more information. - Lay your clay on a sheet of printing paper and cover with a second sheet. Gently flatten and then burnish with your acrylic roller.
- Slice several thin slices from your chosen canes. You can use any flower cane, but today I am using a pansy cane of various diameters from a previous Patreon tutorial.
- Lay your slices over your mica shift in a random pattern.
- Burnish again.
- Unstick your polymer clay veneer from the paper. Lay it back on the paper and put aside.
- Use your Black Stazon Ink pad to ink your letter stamp. I am using Lisa Pavelka's love letter.
- Working quickly, press the stamp gently onto your clay veneer to transfer the ink.
- Set aside to dry for about five minutes.
- Burnish again to make sure it is completely flat and put aside.
- For the backing combine one part silver with one part white and roll through the thickest setting of the pasta machine.
- Texture with any texture you have handy. I am using a roller from eBay.
- Place the backing sheet on the back of your veneer and tap them together.
- Use your chosen cutters to cut out several pendants. I am using my Borneo set from JessamaDesign. Try to keep your Skinner blend across the pieces and include some Pansy cane on each one.
- Smooth along the sides and tops using your fingertips.
- Bake them for a full hour between two pieces of paper at the recommended temperature.
- Sand the edges of your beads using the lighter grits of sandpaper or polishing cloths. Be careful not to sand the fronts because you will remove your ink.
- Place your beads on a silicone mat ready to resin. Mix up your chosen resin and pour it onto your beads. Please watch the tutorial for more information and tips.
- Let the resin cure for twenty four hours.
- Drill your beads with a hand drill.
- Cut a length of accu-flex. I like 16” long. String on a charlotte crimp and then a crimp. Leave a small tail of string and then squish the crimp. Bring the charlotte crimp back up and close it around the crimp. Open a jump ring and link that through the hole in the charlotte crimp. Put your clasp onto the jump ring and close the ring.
- Now you’re set to string. Alternate your silver pearls with your polymer clay pendants.
- To finish your polymer clay necklace just repeat the steps with the charlotte crimps and clasp above.
In the video tutorial I show a lot of different tips and tricks to help get the most out of the process, so please do take a look at that.
Suggested links
- How to Make a Two Part Skinner Blend
- How to Make a Mica Shift
- Pansy Cane Tutorial - Patreon
- Pansy Cane Tutorial - Etsy
- Black and White Flower Cane tutorial
supplies
If you are struggling with the Ice Resin, you can find a full Tips and Techniques tutorial that walks you through the process on my Patreon community page or in my Etsy Shop.
If I have missed something, or you still have questions, please leave a comment below.
You can like my Facebook page or join the Jessama Tutorials Polymer Clay Community on Facebook to stay up to date with more polymer clay tutorials like this one as they are released.


Please leave your comments below: