You are here: Home >> Polymer Clay Surface Effect Tutorials > Oyster Watercolor
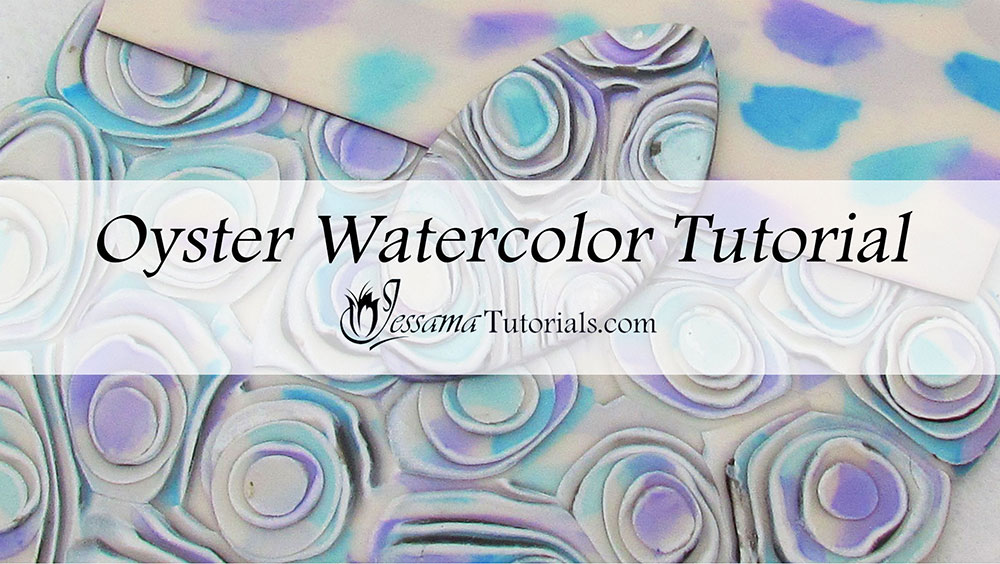
Polymer Clay Oyster watercolor Tutorial
The Polymer Clay Oyster Watercolor technique is a twist on the torn paper idea, one of my
favorite polymer clay surface effects. It is just such a versatile and
fun way to create new designs.
The original technique was developed by Maggie Maggio. I was messing around with it the other day and stumbled across
this version. I like to call it the Polymer Clay Oyster Watercolor Technique
as it looks almost like shell. I hope you like it.
You will need the following supplies:
- Premo Polymer Clay - Black, white, translucent and pearl polymer clay (Video One)
- Premo Polymer Clay - Black, white and translucent polymer clay (Video Two)
- Alcohol ink - Adirondack alcohol ink: Sailboat Blue, Clover and Stonewashed (Video One)
- Alcohol ink - Adirondack alcohol ink: Sailboat Blue, Pool, Turquoise and Mermaid (Video One)
- A brush
- A tissue blade
- A pasta machine
- An acrylic roller
- Graduated circle cutters
Steps To Making Polymer Clay Oyster Watercolor - Video One
-
To start you’ll need to condition and roll your clay to the following thicknesses:
- Black - middle pasta machine setting.
- White - middle pasta machine setting.
- Pearl White - second thinnest pasta machine setting.
- Translucent - thinnest pasta machine setting.
If you are struggling with getting your polymer clay to roll cleanly through the thinner settings, have a look at this quick tutorial: How to Prevent Pasta Machine Ripples. - Lay your white sheet on top of your black and smooth it over to get rid of any air bubbles.
- Lay your pearl white sheet over the white and smooth over again.
- Run this polymer clay stack through the thickest setting on your pasta machine.
- Run the clay sheet though the pasta machine on the middle setting. You want to lengthen the Skinner Blend by running it through the pasta machine from one color to the next.
- Streak small dabs of alcohol ink onto the pearl side of the clay using your brush. randomly alternate the colors and keep adding until you’re happy with the look. I like to leave a lot of pearl exposed so I don’t put too much alcohol ink on.
- Let the alcohol inks dry for three or four minutes.
- Lay your pre-prepared translucent polymer clay sheet over the pearl clay and smooth over to remove air bubbles.
- Run the sheet through the pasta machine on your thickest setting. Go down through the settings until you reach your third thinnest setting.
-
Using your circle cutters start cutting out circles from your sheet. Start with the largest ones first and place them together to form a sheet. Now go down to the next size and cut out the same amount. Place each of these on top of one of the larger ones. Carry on doing this all the way down through your cutters.
I start with a large cutter that’s around 3cms in diameter and go down until I reach a cutter that’s about 3mms in diameter. - Once you’re happy with the number of circles, pinch their edges to distort the shape and bring out the layers underneath the translucent.
- Roll the sheet flat with an acrylic roller. Try to roll in multiple directions. This helps with the torn paper effect.
- Roll through the pasta machine if needed to flatten it out completely.
You will see when you have baked, sanded and buffed your beads, that the pearl will shine through and give the effect of oystershell.
Send in photos using the form below the video if you make anything with the technique. I would love to see them!
The instructions for the veneer on the second video are the same, just using different colors.
Suggested links
- More Watercolor Tutorials
- Part One of video Two Tutorial - Silk and Bubbles
- Part Three of video Two Tutorial
- Small Circle Cutters
- Mini Circle Cutters
- Micro Circle Cutters
If I have missed something, or you still have questions, please leave a comment below.
You can like my Facebook page or join the Jessama Tutorials Polymer Clay Community on Facebook to stay up to date with more polymer clay tutorials like this one as they are released.
You may also like:
You are here: Home >> Polymer Clay Surface Effect Tutorials > Oyster Watercolor


Please leave your comments below: