You are here: Home >> Polymer Clay Surface Effect Tutorials > Silk and Bubbles Veneer
Silk and Bubbles Alcohol Ink Veneer Tutorial
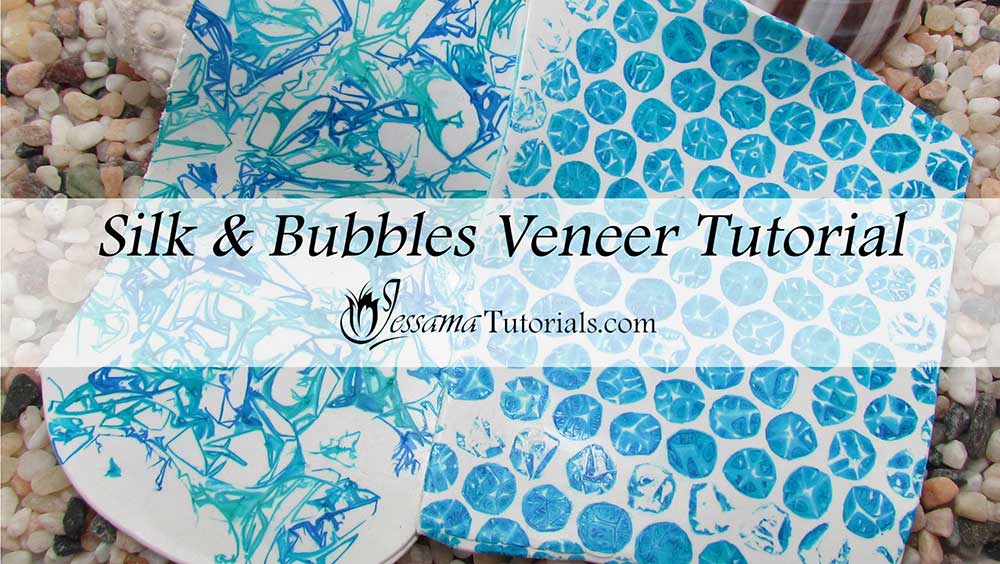
This is the first of a three part collar necklace tutorial. In part one I'll be showing you how to make two different alcohol ink veneers, using cling wrap and bubble wrap. This is a fun and surprisingly easy technique that can yield stunning results, so it's a great one to have in your repertoire.
The links to part two and three are in the suggested links box below the video.
You will need the following supplies:
- Alcohol ink (I’m using Pool, Sailboat Blue, Mermaid and Turquoise Adirondack inks)
- Bubble wrap
- Cling wrap
- White polymer clay
- Small pipettes
- A pasta machine
- Felt on a block of wood
- A needle tool or other sharp object
How to Make the Silk and Bubbles Alcohol Ink Veneer
Bubbles- To start you’ll need a sheet of white polymer clay rolled out on the thickest setting of your pasta machine. It needs to be at least half the size of the collar cutter or template that you will be using to make the collar necklace in part three of this tutorial.
- Next you will need your bubble wrap, a piece of felt mounted on a wooden block, and alcohol ink colors of your choice. (I will be using Turquoise, Mermaid, Sailboat Blue and Pool Adirondack inks.)
- Dab a few drops of each color onto your felt.
- Press it onto the bubbles of the bubble wrap. Move quickly so that it doesn't dry out.
- Turn the bubble wrap over and lay it on your sheet of white clay. Press down firmly.
- Leave it to dry for at least an hour. If necessary, weight the bubble wrap down with something heavy like a book.
- For the second veneer roll out another sheet of white polymer clay the same as the first.
- Tear off a piece of cling wrap and crinkle it up in your hands. Unravel carefully.
- Place over your clay in such a way that there are crinkles and creases. (See the video.)
- When you are happy with your pattern, tap the cling wrap down.
- Next you will need your alcohol inks, small pipettes and something sharp like a needle tool.
- Choose your first ink color and suck some of it up with a pipette.
- Poke a hole in the cling wrap and allow the ink the run into the hole.
- Repeat as many times as you like with all the colors.
- Allow to dry for at least an hour.
We will be using these silk and bubble alcohol ink veneers in part three of this tutorial to make the Rockpool Collar Necklace.
Suggested links
If I have missed something, or you still have questions, please leave a comment below.
You can like my Facebook page or join the Jessama Tutorials Polymer Clay Community on Facebook to stay up to date with more polymer clay tutorials like this one as they are released.
You may also like:
You are here: Home >> Polymer Clay Surface Effect Tutorials > Silk and Bubbles Veneer


Please leave your comments below: