Winters Night Polymer Clay Bib Necklace Tutorial
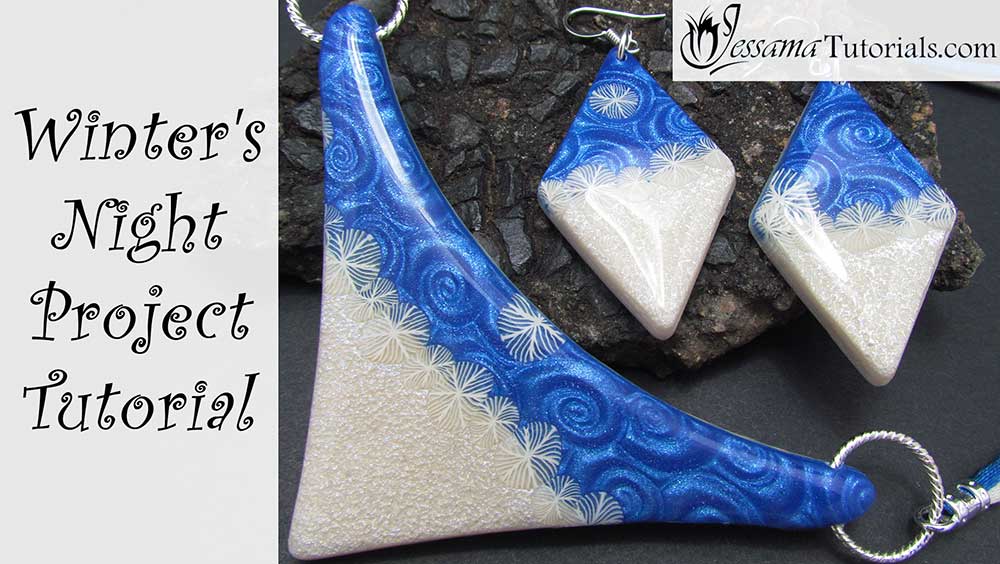
In this tutorial we will be making a beautiful Winter's Night polymer clay bib necklace with earrings to match.
The result is really eye-catching, but you will find that it is so simple to make. The project consists of simple elements of mica shift and texture, with a few slices of snowflake cane to give that wintery feel. I'll show you tips and tricks to get your veneer nice and flat and how to achieve a smooth, glassy finish.
In order to complete this project, you will need a translucent snowflake cane. The link to the tutorial for this is in the suggested links box below the video.
You will need the following supplies:
- Pearl white polymer clay (Premo)
- Kato Magenta and Blue Kato concentrate or Indigo or Amethyst alcohol ink or Ultra Marine Premo
- Coarse sandpaper
- A tissue blade
- A pasta machine
- An acrylic roller
- Gloves
- Lisa Pavelka's Swirly Q texture stamp
- Diamond Cutters
- Pointed Bib Necklace Cutter
- Mica powder sparkle blue
- A brush
- A snowflake cane
- Ice resin
- Two twisted silver Jumprings
- Crimp cord ends
- Blue and white rattail satin cord
- A clasp
- Jumprings
- Ear wires
- A pin drill
- Pliers
How to Make My Winter's Night Polymer Clay Bib Necklace Step by Step
Making the Raw Polymer Clay For the Mica Shift- Option 1: Mix together 5 parts Kato Pearl, 5 parts Kato translucent, 2 parts Kato magenta, 1 part Blue Kato concentrate.
- Option 2: Mix together 2 parts Premo Ultra Marine, 7 parts Premo Pearl.
- Option 3: Mix together Premo Pearl and Amethyst or Indigo Alcohol Ink.
- Roll your clay out on the thickest setting of the pasta machine and dust it with corn starch.
- Lay your clay over your texture stamp, and press in with your fingertips working from one side of the clay to the other to create an imprint.
- Remove the clay from the stamp.
- Shave off the raised areas using your tissue blade.
- Cover with a piece of plain paper and burnish with your fingertips to flatten it out.
- Reduce your translucent snowflake cane from the Silent Night tutorial, until it is quite small.
- Roll out a sheet of pearl white clay on the thickest setting of your pasta machine, cover with very coarse sandpaper and burnish to texture it.
- Dust with Sparkle Blue mica powder.
- Trim your two sheets so that they will fit nicely together.
- Cut thin slices from your snowflake cane and lay a few slices randomly on your mica shift.
- Roll flat with your acrylic roller.
- Overlap your snow sheet slightly over your mica shift sheet and use a craft knife to cut a wiggly edge.
- Join your two sheets together and lay slices of snowflake cane along the join.
- Gently flatten using your roller, without flattening the textured snow sheet.
- Make a second sheet of snow clay, as before. We will use this for the backing of the necklace.
- Place it textured side down on a piece of plain paper then lay your veneer over it.
- Gently smooth them together checking for bubbles as you go.
- Use your Pointed Bib Necklace Cutter to cut out a piece with the snow at the bottom and the mica shift at the top.
- On the video I show you how to use the leftover pieces to make a new veneer so that you can make earrings too, and how to salvage the leftover clay so that you don't have too much waste.
- Smooth the edges and then bake for a full hour at your brand's recommended temperature.
- Sand your pieces lightly on the blue mica shift to remove any mica powder residue, and then sand the edges.
- Place your pendants onto a silicone waffle mat and apply a layer of Ice Resin. (You can also use Magic Gloss or other UV resin.) Let this cure for 24 hours.
- Once cured, use a pin drill to drill a hole through each side of the bib.
- Thread a jumpring through each hole.
- Thread a length of your chosen cord onto each jumpring. I am using bugtail with crimp ends on either end for attaching.
Suggested links
Supplies
- Pointed Bib Cutter
- Diamond Cutters
- Blue Sparkle Mica Powder on FireMountainGems.com
- Pin Drill
- Kato Concentrates (Primary Color Pack)
If you are struggling with the Ice Resin, you can find a full Tips and Techniques tutorial that walks you through the process on my Patreon community page or in my Etsy Shop.
If I have missed something, or you still have questions, please leave a comment below.
You can like my Facebook page or join the Jessama Tutorials Polymer Clay Community on Facebook to stay up to date with more polymer clay tutorials like this one as they are released.


Please leave your comments below: