You are here: Home >> Polymer Clay Jewelry Projects > Midnight Wood Necklace and Bracelet
Polymer Clay Projects - Midnight Wood Necklace and Bracelet
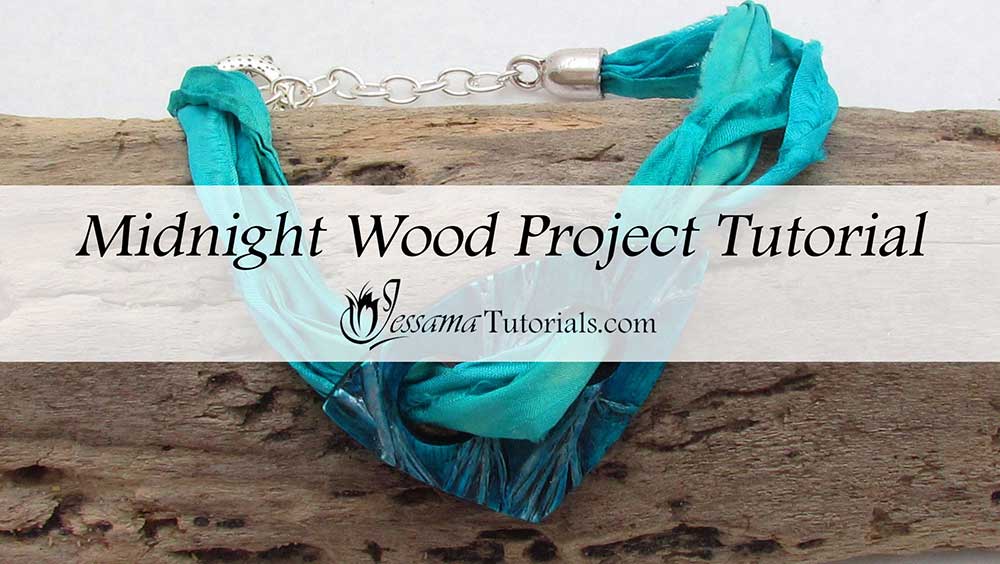
In this third and final video in the Midnight Wood polymer clay projects series, we will create a stunning polymer clay necklace and bracelet. We’ll use sari ribbon,
but you could use any ribbon or knotted cord you want for this project.
In part one I showed how to make a homemade dead tree texture plate from polymer clay. In part two we made two beautiful midnight wood pendants using the stamp. We'll use these pendants to make the jewelry in this tutorial.
You will need the following supplies:
- Two midnight wood pendants
- Sari ribbon (I’m using a turquoise one from eBay)
- Four silver end caps
- Nymo thread
- Bugtail or any other thick cord
- E6000 glue
- Two silver clasps
- Four silver jumprings
- Silver chain
- Flush cutters
- Flat nose pliers
- A skewer
The Midnight Wood Pendants Polymer Clay Projects Step by Step
-
To start you’ll need your two midnight wood pendants; one curved and one flat.
See part two of the project to see how to make them.
- Measure your neck so that the necklace will fit as a choker. Remember to include room for the clasp. If in doubt make the necklace shorter than needed as it’s easier to fix that way. We can add a length of chain if it’s too short.
- Cut three pieces of sari ribbon to the right length and entwine them together.
- Tie off the ends with Nymo thread and if needed bulk up the ends with a thicker cord so that they will fit snuggly into the end caps. (I use bug tail).
- Trim away any excess cord.
- Apply a generous amount of E6000 glue to one end and slide your end cap over the glue.
- Hold the cap in place for a while to set.
- Now take a jumpring and attach it to the top of the end cap. Attach one half of your clasp to that jumpring. Close the jumpring.
- Next take your flat pendant and loop the sari ribbons through the two holes like you would a button.
- Attach the second end cap, jumpring and clasp as above.
- If the necklace ends up a little short, use the jumpring to attach a length of chain and then link up the clasp.
- Repeat the process above for the bracelet, using the curved pendant this time.
Suggested links
- Part One - How to Make a Dead Tree Texture Stamp from Polymer Clay
- Part Two - Midnight Wood Pendant Tutorial
- Dead Tree Texture Stamp on Etsy
If I have missed something, or you still have questions, please leave a comment below.
You can like my Facebook page or join the Jessama Tutorials Polymer Clay Community on Facebook to stay up to date with more polymer clay tutorials like this one as they are released.
You may also like:
You are here: Home >> Polymer Clay Jewelry Projects > Midnight Wood Necklace and Bracelet


Please leave your comments below: