Pebeo Paint Polymer Clay Earrings Tutorial
In this three part polymer clay earrings project, I'll show you how to apply Pebeo paint to flat clay without the paint "running away", eliminating the need for a bezel and introducing more design possibilities.
Most Pebeo paint and polymer clay projects involve the use of bezels.
The bezels contain the paint and prevent it from spilling. But what if
you don't want a bezel as part of your design? What if you want a donut,
for instance?
In this project we'll be making three pairs of earrings and a pendant, where I'll show you
how to make flat textured clay blanks and how to apply Pebeo paint to them without the paint spilling off the sides.
Eliminating the need for a bezel allows for many more
interesting and intricate design options, such as using the paint on domed or curved surfaces, and combining the paint with other polymer clay techniques. I'll be exploring some of these design ideas in the future, but for now, let's learn how to keep that paint in its place!
You will need the following supplies:
- A circle cutter set
- Black polymer clay
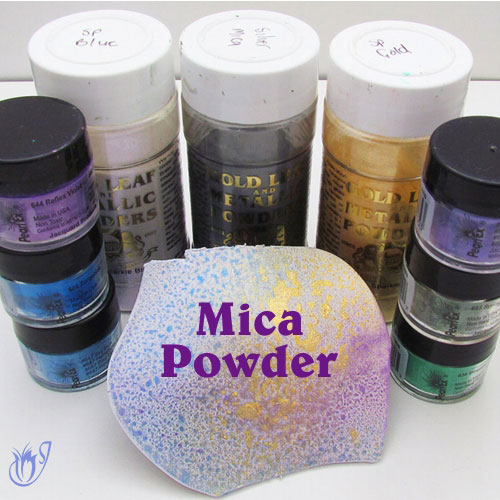
- Silver mica powder
- A piece of sponge or sandpaper for texture
- An oven
- A pasta machine
- An acrylic roller
- A tissue blade
- A skewer
- Pebeo Prism Paint (I’m using Eggshell White, Almond Green, Marina and Onyx)
- Pebeo Moon Paint (I’m using Emerald)
- Ice resin
- A measuring cup
- A curing mat
- A hand drill
- Renaissance wax
- Twelve silver
jumprings
- Six ear wires
How to Make the Bases for the Pebeo Paint Polymer Clay Earrings and Pendant
- To start you’ll need a sheet of black clay rolled out on the thickest setting of your pasta machine.
- Texture one side of the sheet using sponge or sandpaper, or any other texture that you prefer. Make sure to press hard enough so that you are left with a good texture imprint.
- Brush over the texture lightly with silver mica powder.
- Cut out two circles for each pair of earrings you want to make. You can choose whatever size you prefer, but the bigger the surface, the more space you will have to work with the Pebeo paints in part two of the tutorial.
- For the pendant, cut out a large circle from the black sheet, then cut a smaller circle from near the top to make a donut shape. Use a skewer to carefully remove the small circle.
- Gently pick up each circle, one at a time, using your blade and smooth off the edges of each one.
- Bake all of your bases for a full hour at the recommended temperature of your polymer clay brand.
How to Apply the Paint to the Polymer Clay Earrings and Pendant Bases
- I'm going to be using three pairs of polymer clay earrings bases and a donut base.
- Before you start, thoroughly mix your paints until the dark translucent color changes to a lighter metallic color.
- For this set we'll use the Almond Green, Marina and Eggshell White Prisme paint.
- Apply these in a sort of stripe formation using your skewer. Work up to the edges, but not so close that you break the surface tension. First the Almond Green, then the Eggshell White and finally the Marina. (See the video for more information on how to apply the paint.)
- Go back and add dots of the colors into different areas. Maybe some of the White in the Marina and some of the Green in the White. Mess around and have fun.
- Once you’re happy with those put them aside and bring over another pair of earrings.
- For this set we'll also use the Almond Green, Marina and Eggshell White Prisme paint.
- Drip the paint onto the earrings. You can see what a difference it makes to the pattern.
- Put this pair aside.
- For this set we'll use the Eggshell White and Onyx Prisme paint.
- This time we’ll drag the colors in random directions to get a sort of patch work effect.
- Put this pair aside too.
- For the donut we'll use the Almond Green, Marina and Eggshell White Prism paint, as well as the Emerald Moon paint.
- Streak the Prisme paints over the donut like zebra stripes.
- Drip a tiny drop of the Moon paint into a few chosen areas. The Moon paint stops the Prisme paints from blooming so don't apply too much.
***UPDATE*** After much experimenting I've discovered that Pebeo paint takes a lot longer to cure on polymer clay. It appears cured on the surface after a week, but if you scratch the paint off, you'll find that the bottom layers are still tacky. I now recommend curing your paint for two months before applying a polymer clay sealer or resin. Applying the sealer earlier than this can cause yellowing.
It's very important that you apply the paints correctly to achieve the right results, so please see the video for more in depth instruction and lots of tips and tricks to make the process easier.
How to Finish Off Your Polymer Clay Earrings
- I'm going to be finishing these polymer clay earrings with Ice Resin, but you can use Ultradome, Magic Gloss or any other recommended polymer clay resin. I don't recommend other varnishes, such as Varathane, because the Pebeo paint can be quite easily damaged and, therefore, needs a good, hard covering to protect it properly.
- Before applying resin, sand the sides of the pieces to a nice, high gloss. Don't sand the fronts or backs.
- Apply a light layer of Renaissance wax to the sides and backs.
-
For this tutorial, I'll be using the Ice Resin two part plunger. It measures out the correct amount of each part of the resin for you, thereby eliminating the chance of your resin not curing due to incorrect measuring.
In my opinion, measuring the components of two part resins correctly is the hardest part of the process, so the plunger is a great idea until you've had some practice. It also allows you to work in very small amounts which means smaller batches of pendants. - Pour out the resin into a little cup and mix it thoroughly. Then let it rest for around a minute so that the largest air bubbles rise to the top of the resin where you can pop them.
- Place the pieces that you want to resin on a curing mat, preferably silicon. Using the correct mat eliminates many headaches, so see the video for what I recommend.
- Pour the resin slowly onto each piece and blow gently over the surface with a straw to pop any bubbles. See the video for the procedure.
-
Allow to cure for twenty four hours.
For more detailed instructions on using the resin, see my Ice Resin Tutorial.
- Once cured, drill holes in the tops of your earrings, resin side up.
- Thread a jump ring through each of these holes and then another jump ring through those jump rings.
- Thread an ear wire onto each of the top most jump rings and you’re finished making your polymer clay earrings.
Pebeo Paint Polymer Clay Earrings Tutorial - Part one
Pebeo Paint Polymer Clay Earrings Tutorial - Part Two
Pebeo Paint Polymer Clay Earrings Tutorial - Part three
***UPDATE*** After much experimenting, I've discovered that Pebeo paint takes a lot longer than a week to cure on polymer clay. It appears cured on the surface after a week, but if you scratch the paint off, you'll find that the bottom layers are still tacky. I now recommend curing your Pebeo paint for at least six weeks, but preferably two months before applying a polymer clay sealer or resin. Applying the sealer earlier than this can cause yellowing.
please like and share!
Suggested links
supplies
If I have missed something, or you still have questions, please leave a comment below.
You can like my Facebook page or join the Jessama Tutorials Polymer Clay Community on Facebook to stay up to date with more polymer clay tutorials like this one as they are released.


Please leave your comments below: