You are here: Home >> Polymer Clay Charms > Polymer Clay Book Charm
Cute Polymer Clay Book Charm Tutorial
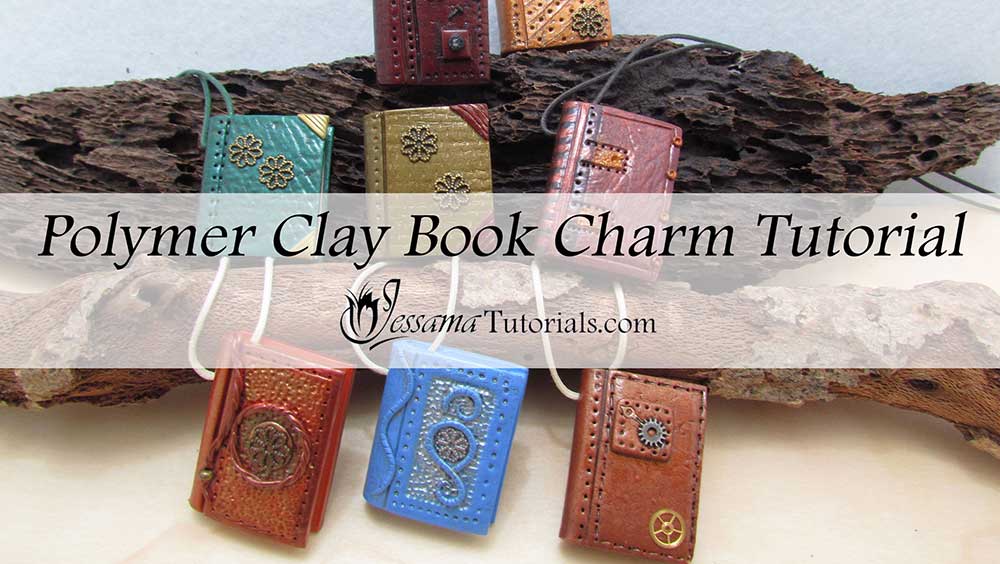
In this tutorial we will be making some cute little polymer clay book charms. You can use these as pendants, bookmark ends, key rings, fridge magnets or anything else you can think of.
They are really versatile, because you can make them in virtually any color and add whatever textures and embellishments you have lying around. They're quick and simple to make and loads of fun.
You will need the following supplies:
- White polymer clay and a bunch of any other colors you want (Premo)
- A tissue blade
- A pasta machine
- An acrylic roller
- A craft knife
- An oven
- Textures (I’m using Scapbooking paper for texture)
- Embellishments (Bead caps, stone, shells)
- A piercing pin
- A ball tool
- Varathane or other varnish
- Wire
- A pin drill
- Wax cotton thread
- Crimps
- A clasp
- Jumprings
- Pliers
How to Make Simple Polymer Clay Book Charms Step by Step
- To start with, you will need a few different colors of polymer clay. You can use straight from the packet, or mix something up specifically. I have just used some balls of clay that I had leftover from previous projects. You will also need white polymer clay.
- Roll out your white to 3mm thick and cut a piece for each book you want to make. Each piece should be 2cm by 3cm. These white pieces will form the inside of your books.
- Roll out your colors to 2mm thick and cut a piece for each book you want to make. Each piece should be 3.5cm by 5.2cm. These colored pieces will form the outside of your books.
- Put the white pieces aside for now.
- Lay your colored pieces out on your work surface and texture each one with a texture of your choice. I am using scrap booking papers which I just lay over the clay and burnish the texture on with my fingers.
- Tidy up your edges after burnishing.
- Fold each piece in half gently to determine where the middle of the book will be.
- Position one of your white pieces inside each cover and refold.
- Gently push together.
- Use your tissue blade to score the edges of the white pieces so that they look like pages.
- Use a piercing pin to create an indentation on the front cover where the spine would be. Use a ball tool to add more detail.
- Add embellishments. See the video for examples.
- Dust with mica powders if you want to.
- Bake for an hour at Premo's recommended temperature, sandwiched between two tiles and pieces of paper.
- When cooled, add paint if you want to, to antique the surface. Pounce the paint onto the surface using a soft brush and then wipe off with a cloth with a rubbing motion. Dampen the cloth with water if necessary.
- If your embellishments come off, don't worry. When you have finished antiquing your pieces, just stick them back in place using translucent liquid clay.
- Bake for another half an hour at Premo's recommended temperature, or use your heat gun to cure them.
- Drill a hole diagonally through the spine using a pin drill.
- Thread a piece of wire through each hole, and twist off. You will use this to hold the book while you dip it in the varnish.
- Dip each book and use a soft clean brush to remove excess drips.
- Hang your books up with a piece of paper beneath to allow the Varathane to drip off and cure for 12 to 24 hours.
- Cut a length of cotton stringing cord of your choice. Squish a crimp bead on one end and add a jumpring and clasp.
- Thread the other end of the cord through the book. Enlarge the hole if necessary.
- Squish a crimp bead on the other end and add a jumpring and clasp.
- Repeat for each polymer clay book charm you have made.
If I have missed something, or you still have questions, please leave a comment below.
You can like my Facebook page or join the Jessama Tutorials Polymer Clay Community on Facebook to stay up to date with more polymer clay tutorials like this one as they are released.
You may also like:
You are here: Home >> Polymer Clay Charms > Polymer Clay Book Charms


Please leave your comments below: