You are here: Home >> Charm Tutorials > Polymer Clay Shell Pendants
Realistic Polymer Clay Shell Pendants Tutorial
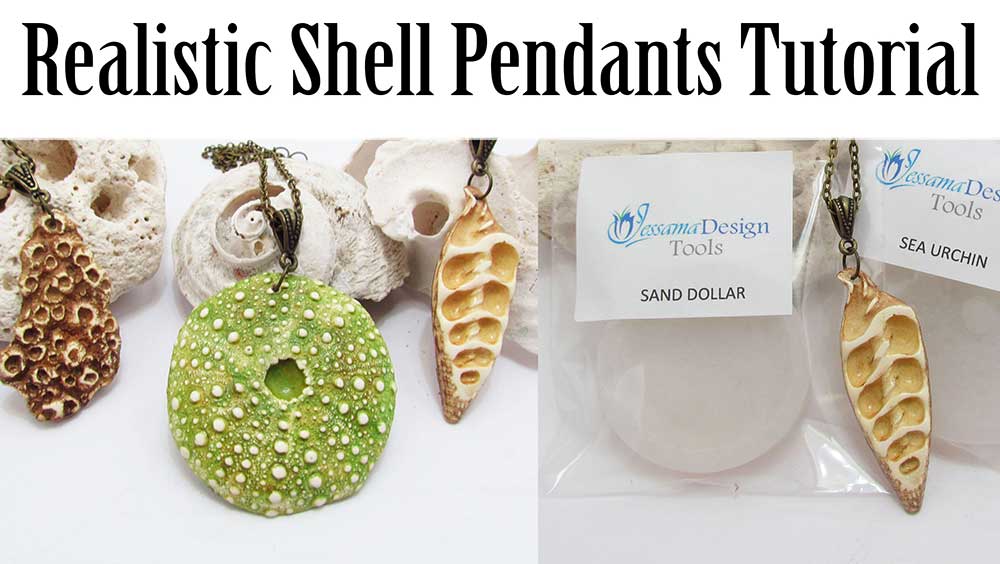
In this polymer clay shell pendant tutorial I'll be showing you a quick and easy way to bring the beach into your home, no matter where you live.
These pendants make a great addition to your market table, and the technique can be used to create all sorts of different effects. All you need is a mold that inspires you and a few pastels. It couldn't be simpler, but the results are realistic and beautiful.
You will need the following supplies:
- White polymer clay (premo)
- A craft knife
- A tissue blade
- Sandpaper
- An oven
- Shell molds
- Pastels
- Paint (Festive Green, Rich Espresso)
- A brush
- 99% alcohol
- Baby wipes
- Polishing Papers
- A pin drill
- Varathane (or other varnish)
- Chain
- Bails
- Jumprings
- Clasps
Polymer Clay Shell Pendant Project Step by Step
- First you need some silicone shell molds. I will be using some of mine from JessamaDesign.
- Next, you need to condition your white Premo clay. You can do this easily by just rolling it about in your hands.
- Press a ball of clay into your mold. Start in the middle and work your way out.
- Texture the back using a coarse piece of sandpaper. Burnish over any shiny spots.
- Gently demold your piece.
- Repeat for each mold you want to use.
- I made a sandy pebble for the small barnacle to sit on. I just molded the clay roughly to the shape I wanted and textured the top, back and edges with coarse sandpaper and popped the barnacle on top. You can trim it up a bit if you want.
- When all your pieces are ready, you can begin coloring them with pastels.
- To color with pastels: Shave your chosen colors onto your pieces and use a soft brush to dab the pastel on. Don't forget to do the back too.
- If you want to, you can remove some of the pastel from the raised parts by rubbing with an alcohol soaked wet wipe. This emphasizes the pattern. You can also do this after baking by sanding if you prefer.
- Bake your polymer clay shell pendants for an hour at the recommended temperature for your brand.
- When your pendants are cool you can antique them with paint. I am using Dazzling Metallics Espresso and Festive Green.
- Brush the paint into all the crevices and don't forget the backs and sides.
- Allow to dry until tacky.
- Use a wet wipe to remove some of the paint by dabbing and carefully wiping it away.
- Sand your shell pendants using wet/dry sandpaper or polishing papers to remove the last traces of paint and pastel from the textured parts that you want to expose.
- Use a pin drill to drill holes through each pendant.
- String your pendants onto a piece of wire so that they aren't touching each other. Dip them into your pot of Varathane, or other varnish, then suspend your wire somewhere to let the excess varnish drip off and then for your pendants to dry.
- Keep an eye on them and clean up any drips if necessary.
- Leave to dry for an hour or two.
- Pop a jumpring through each hole, attach a bail and string onto a piece of chain with clasps attached.
In the video tutorial I give some other ideas for different ways to color and antique your polymer clay shell pendants, so please do take a look at that.
Suggested links
- Sliced Shell Mold
- Urchin Mold
- Large Barnacle Mold
- Small Barnacle Mold
- Sand Dollar Mold
- Polishing Papers
- Pin Drill
If I have missed something, or you still have questions, please leave a comment below.
You can like my Facebook page or join the Jessama Tutorials Polymer Clay Community on Facebook to stay up to date with more polymer clay tutorials like this one as they are released.
You may also like:
You are here: Home >> Charm Tutorials > Polymer Clay Shell Pendants


Please leave your comments below: