You are here: Home >> Polymer Clay Home Decor > Riverstone Polymer Clay Coaster
Riverstone Polymer Clay Coaster Tutorial
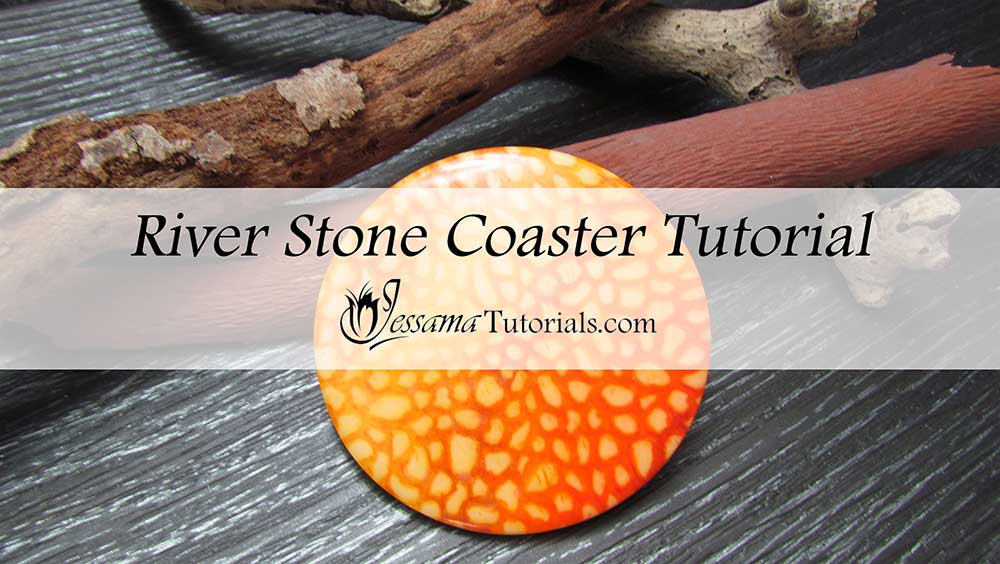
In this tutorial we will be making a polymer clay coaster using pastels and a simple texturing technique to create the veneer. This technique is one of my favorites because it is just so simple but so effective.
In this tutorial, the pebble pattern of the stamp gives the effect of stone, but you can vary the colors and textures to create many different interesting results.
You will need the following supplies:
- Pastels
- Black, white and translucent Premo polymer clay
- A tissue blade
- A pasta machine
- An acrylic roller
- Maxi circle cutter
- A soft brush
- A craft knife
- A Dragonscale or Pebble stamp
- An oven
- Plain printing paper
- Sponge texture
- A wet wipe
- 99% alcohol
- Cling wrap
- Sandpaper or polishing papers
- Renaissance wax
- A rotary tool to buff
How to Make The Riverstone Polymer Coaster Step by Step
- To start with, you will need a sheet of white polymer clay rolled out on the thickest setting of your pasta machine.
- You will also need a stamp with some sort of pebble pattern. Today I will be using the Pebble stamp from my shop JessamaDesign.
- Dust your stamp with cornstarch.
- Press your clay onto your stamp using your fingertips, working from one side to the other.
- Remove carefully and trim the edges of your clay.
- Next, you will need some pastels. I'm going with a reddish-brown color palette today.
- Use your craft knife to shave a generous amount of your pastels in your chosen colors over your clay. You can use any pattern or combination of colors that you want to.
- Use a soft brush to dab the pastel powder onto the clay. If there is any white clay still showing through, add some more pastel.
- Lift up your clay and brush off any excess pastel. You can put the leftover pastel in a small bag for another project.
- Replace your clay on the clean tile and make sure it is stuck down. Spray some alcohol onto your clay and gently wipe with a wet wipe to remove some of your pastels from the raised areas.
- Remove or leave as much or as little as you like, until you are happy with the contrast.
- Blow the clay to dry it off, then roll it through the thickest setting of your pasta machine. Flip it around and take it down one setting. Repeat twice more.
- Cover with a plain piece of printing paper and burnish until flat.
- Run a sheet of Premo translucent through the thinnest setting on your pasta machine.
- Carefully smooth over your veneer, eliminating air bubbles as you go.
- Trim excess away.
- Cover with plain printing paper and burnish. Use your palm to smooth away the texture left behind by the paper.
- Clean up your tile.
- Roll out a sheet of black polymer clay on the 5th setting of your pasta machine - about 3mm.
- Apply a texture of your choice. I am using a sponge.
- Place the black to the side.
- Place your veneer on a piece of plain printing paper, face down. Then lay the black backing, texture facing up, over the top of it. Gently smooth away air bubbles.
- Trim away the excess black clay.
- Use a large cutter of your choice to cut out your coaster. I am using the largest cutter in my Maxi Circle Set.
- Cover your cut out with cling wrap and cut again to give a slight dome.
- Trim up the edges and smooth them with your fingertips or the flat of your blade.
- Gently smooth away any fingerprints.
- Bake in the oven for 45 minutes at the recommended temperature.
- Give your coaster a good sand working all the way from your lowest to your highest grit. I go from 400 to 8000.
- Buff using a soft cloth or a rotary buffing tool if you have one.
- Apply a light coat of Renaissance wax using a soft cloth.
- Buff again.
- You can also add resin to the top if you want a glassy look. In this case, skip the step using the cling wrap to dome the coaster.
Suggested Links
- Maxi Circle Cutters
- More Maxi Cutters
- Pebble Texture Stamp
- Dragonscale Texture Stamp
- More Texture Stamps
- Buffing Wheels
- How to avoid rippling your clay
If I have missed something, or you still have questions, please leave a comment below.
You can like my Facebook page or join the Jessama Tutorials Polymer Clay Community on Facebook to stay up to date with more polymer clay tutorials like this one as they are released.
You may also like:
You are here: Home >> Polymer Clay Home Decor > Riverstone Polymer Clay Coaster


Please leave your comments below: